The Happy Rainbow Granny Square Bag – Pattern is a delightful, colorful project that combines nostalgia with vibrant modern flair.
Designed for both new and seasoned crocheters, this cheerful crochet bag is built from classic granny squares, making it a fun, modular project with endless customization options.
As the name suggests, it’s meant to bring joy—both in the making and in the wearing.
The beauty of the Happy Rainbow Granny Square Bag – Pattern lies in its simplicity and charm. Each square is a burst of color, reminiscent of vintage crochet projects, yet the finished tote is perfectly suited for contemporary fashion. Whether you want to carry it to the market, beach, or brunch, this bag stands out with its handmade elegance and playful personality.
In this article, we’ll walk you through everything you need to know to make your own Happy Rainbow Granny Square Bag, from materials and construction to customization ideas and helpful tips. You’ll also find a detailed FAQ at the end to answer the most common questions, ensuring a smooth crafting experience that follows Google AdSense content guidelines and recommended SEO best practices.
1. What Makes the Happy Rainbow Granny Square Bag Special
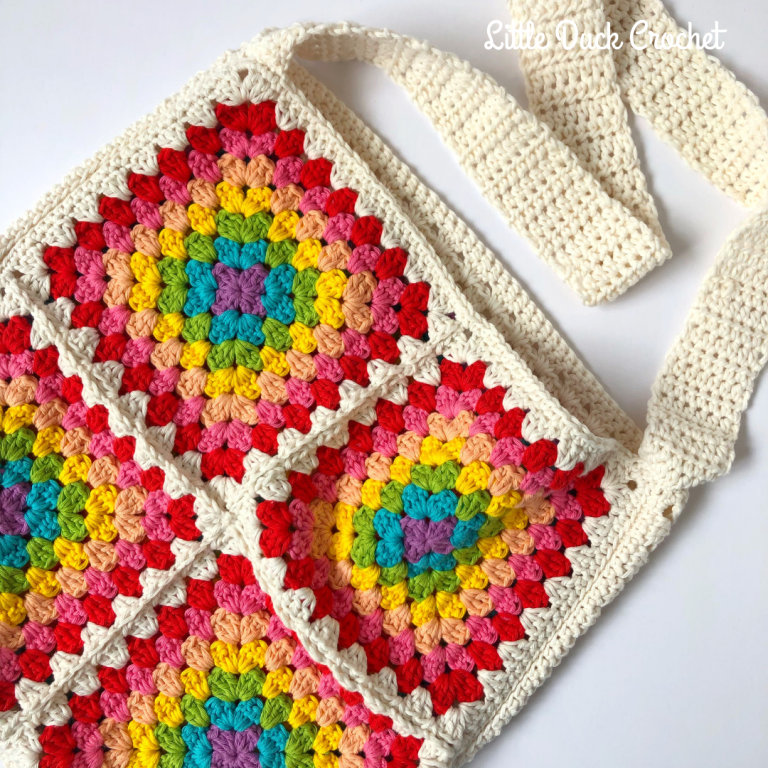
The Happy Rainbow Granny Square Bag – Pattern takes the timeless granny square motif and transforms it into a practical, joyful accessory. Granny squares have long been loved for their versatility and ease, and using them to construct a tote bag brings a nostalgic yet trendy feel to your wardrobe.
This pattern encourages creativity with colors. Typically, each square features a different combination of bright, rainbow-inspired hues, bringing visual interest and a sense of playful charm. The result is a bag that is not just functional but a wearable piece of art.
One reason this project is beginner-friendly is that it consists of smaller, manageable pieces—each granny square is a mini achievement. Once the squares are completed, they are joined together to form the body of the bag. This makes the project ideal for crocheters who like working in stages.
The pattern usually uses a traditional granny square stitch, made up of chains, double crochets, and slip stitches. These are basic crochet stitches, making this pattern accessible even if you’re still learning the ropes.
Another delightful aspect of this pattern is that it can be adapted in countless ways. You can choose how many squares to use, change the size, add lining, or sew on a zipper or magnetic snap. This flexibility makes it a fantastic stash-busting project.
Whether you’re making it as a gift or for yourself, the Happy Rainbow Granny Square Bag – Pattern is sure to bring smiles. It’s colorful, lightweight, and spacious enough to hold everyday essentials with style.
2. Materials and Tools You’ll Need
To make your own Happy Rainbow Granny Square Bag, you’ll want to gather the right materials and tools beforehand. Being prepared will make the process more enjoyable and efficient from start to finish.
Start with yarn—cotton or a cotton blend is ideal for bags because it holds shape well and is easy to clean. Worsted weight (medium 4) yarn is a popular choice for this pattern, and you can use leftover yarn from previous projects to enhance the “rainbow” aspect.
You’ll need a crochet hook suited to your yarn, typically around a 4.0 mm (G) to 5.5 mm (I) hook. The size will affect the size and tightness of your granny squares, so it’s a good idea to make a small swatch and adjust accordingly if necessary.
Basic crochet tools like scissors, a tapestry needle, and stitch markers will come in handy. You’ll use the scissors to cut yarn cleanly, the needle to weave in ends and sew the squares together, and markers to keep track of square counts or round starts.
Optional items include fabric and thread for lining the bag. Adding a lining not only strengthens the bag but also gives it a professional finish and prevents stretching, especially if you plan to carry heavier items.
Some crafters also like to add wooden or leather handles, or crochet their own handles from simple straps or twisted cord. The finishing touch can include embellishments like buttons, tassels, or even a pom-pom for extra personality.
No matter how you choose to personalize your tote, the key to success with the Happy Rainbow Granny Square Bag – Pattern is starting with good-quality, coordinated materials that match your vision.
3. How to Make the Happy Rainbow Granny Square Bag – Step by Step
The process of making the Happy Rainbow Granny Square Bag – Pattern is as enjoyable as the final result. Here’s a simplified overview of the steps involved to help guide your project.
1. Make Your Granny Squares
Start by crocheting individual granny squares. Typically, each square is made using double crochet clusters, forming rounds that radiate from the center. You can make them as colorful or as minimal as you like. A bag usually uses between 13 and 20 squares depending on the size.
2. Block Your Squares
Once all your granny squares are complete, block them to ensure uniform size and flatness. Blocking helps your final bag look polished and makes assembly easier.
3. Join the Squares
Arrange the squares in the pattern you desire—many people go for a symmetrical or rainbow-gradient look. Use a whip stitch or slip stitch to join the squares together, creating the front and back of the bag as well as any side panels or base.
4. Add Handles
Crochet sturdy handles by making thick straps using single crochet or half-double crochet rows. Sew them securely to the top edges of the bag. You can also use store-bought bag handles for a more refined finish.
5. Add a Lining (Optional)
If you’d like your bag to have more structure or prevent items from poking through the holes, sew a simple fabric lining and hand-stitch or machine-sew it into place inside the bag.
6. Finishing Touches
Weave in all your yarn ends with a tapestry needle, trim any excess, and do a final steam block if needed. At this point, your Happy Rainbow Granny Square Bag is ready to use or gift.
Following these steps will help ensure a smooth project flow and a beautiful final product. Use your pattern as a guide, but feel free to modify it to make the tote uniquely yours.
4. Customization and Creative Ideas
One of the greatest joys of the Happy Rainbow Granny Square Bag – Pattern is how customizable it is. Here are some creative ideas to help you make a tote that truly reflects your style.
1. Color Themes
While the rainbow palette is cheerful and bright, you can also opt for pastels, monochrome shades, or seasonal color schemes (like autumn tones or ocean blues). The color combinations are endless and can suit any season or occasion.
2. Square Variations
Try using different granny square patterns such as sunburst squares or solid squares. Mixing and matching different styles gives your tote a fun patchwork look with added texture.
3. Personal Touches
Add your initials using surface slip stitch embroidery or sew on decorative patches. Adding these small details makes the bag a true personal statement.
4. Shapes and Sizes
You’re not limited to a standard tote shape. By playing with how you arrange the squares, you can make rectangular, triangular, or even cylindrical bags. Use fewer squares for a small purse or more for a beach-size tote.
5. Closures and Security
Add a drawstring, zipper, or magnetic snap to secure your bag’s contents. These additions make the tote more functional and better suited for everyday use.
6. Eco-Friendly Twist
Use upcycled or scrap yarns to make an environmentally friendly version. Many crafters love using this pattern as a sustainable option since it’s a great way to reduce yarn waste.
These custom touches make every Happy Rainbow Granny Square Bag completely unique. The more you experiment, the more fun the process becomes.
FAQ – Happy Rainbow Granny Square Bag – Pattern
Q1: Is this pattern suitable for beginners?
Yes! The pattern uses basic crochet stitches like chain, slip stitch, and double crochet, which are perfect for beginners learning to build confidence with small, repetitive projects.
Q2: How many granny squares do I need for the bag?
It depends on the size of the squares and the desired bag dimensions, but most versions use between 13 and 20 granny squares.
Q3: What yarn is best for this project?
Worsted weight cotton yarn is ideal because it’s strong, easy to work with, and maintains its shape well. You can also use acrylic for a lightweight option.
Q4: Can I add a lining to the bag?
Yes, adding a fabric lining is optional but recommended for extra strength and to prevent small items from falling through the gaps.
Q5: How do I clean the finished bag?
If made with cotton yarn, it can usually be hand-washed or machine-washed on a gentle cycle. Always check the yarn label for care instructions.
Q6: Can I sell bags made from this pattern?
Generally yes, especially if it’s a free or openly licensed pattern. Always check the specific terms of use from the pattern’s designer.
Conclusion
The Happy Rainbow Granny Square Bag – Pattern is more than just a crochet project—it’s a joyful experience filled with color, creativity, and personal expression. Whether you’re a beginner or an expert, this pattern offers a fulfilling way to create something both practical and beautiful.
In this article, we covered the basics of what makes the bag special, how to prepare your materials, the steps to make it, and fun ways to customize your creation. We also provided a helpful FAQ to support your crafting journey.
Now it’s your turn—grab your yarn, your hook, and start crafting your own Happy Rainbow Granny Square Bag!
If you’ve completed one or have suggestions for other crocheters, please leave a sincere comment below. We love hearing your feedback and creative ideas. Happy hooking!