If you’re looking for a charming and whimsical addition to your next quilting or sewing project, the Whale block – Pattern might be exactly what you need. With its clean lines, friendly shape, and ocean-themed appeal, this pattern is popular among crafters who want to bring a splash of creativity and fun into their fabric art. Whether you’re making a baby quilt, wall hanging, or ocean-themed project, this block fits perfectly into any vision.
The Whale block – Pattern is especially loved for its versatility. It can be pieced traditionally, used with appliqué, or even adapted for foundation paper piecing. Its simplicity makes it suitable for beginners, while experienced quilters can enjoy customizing it with color variations, textures, and background designs. The whale motif appeals to kids and adults alike, making it ideal for all ages and projects.
In this article, we’ll walk you through every aspect of working with the Whale block – Pattern, from materials and cutting techniques to sewing, customization, and maintenance. We’ll also cover the most frequently asked questions and offer helpful tips to get the most out of this playful and creative design. Let’s dive into the world of fabric whales!
1. Materials and Preparation for the Whale Block – Pattern
Before you begin sewing your Whale block – Pattern, it’s important to gather the right tools and materials. The quality of your final result heavily depends on good preparation and fabric selection. Let’s make sure you’re set up for success from the start.
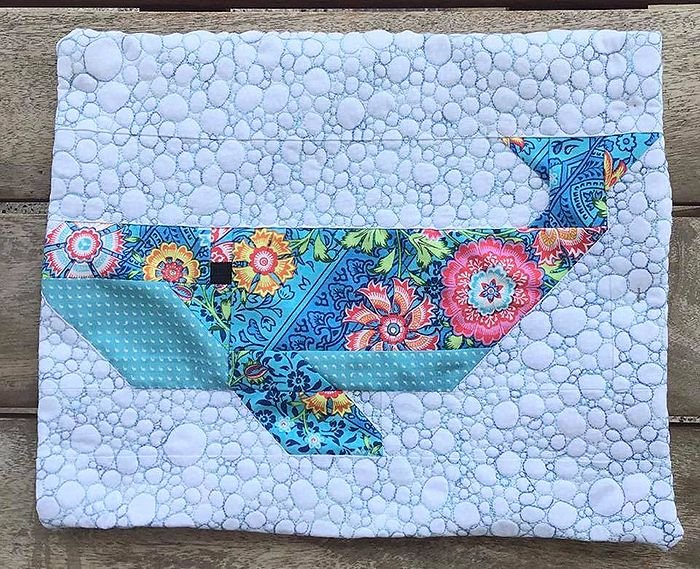
Start by choosing your fabrics. For a classic whale look, you’ll want a solid or lightly patterned blue or gray for the body. The background can be anything from crisp white to ocean-like blues or playful prints. Make sure the whale fabric contrasts well with the background for visibility.
For added texture or personality, consider using batik fabrics or even denim for the whale. Quilters who enjoy a more whimsical look might choose polka dots, waves, or even novelty prints like little fish or stars. The options are endless when it comes to personalization.
Make sure your tools are ready. You’ll need a rotary cutter, quilting ruler, cutting mat, fabric scissors, pins or clips, and a sewing machine. If you’re planning to use appliqué, have your fusible web or stabilizer ready as well.
If you’re following a printed Whale block – Pattern, be sure to print your template at 100% scale and double-check measurements. For paper piecing, prepare your foundation paper and organize your fabrics before stitching begins.
Iron all your fabrics before cutting to avoid any distortions. Smooth, flat fabric pieces lead to cleaner cuts and more accurate block shapes, which is essential when assembling a quilt top or piecing multiple blocks.
Once you’ve prepped your fabric and tools, you’re ready to cut your pieces. Take your time here—precision makes a big difference, especially with angular or curved pieces like those found in the Whale block – Pattern.
2. Assembling the Whale Block Step by Step
With your materials prepared, it’s time to start piecing the Whale block – Pattern. Whether you’re following a simple patchwork method or using a paper-pieced design, following each step carefully ensures a crisp, professional finish.
Start with the body of the whale. Most patterns include a large rectangle or curved shape for the whale’s body, which will be the focal point of the block. Sew this piece to any adjoining sections, like the tail or the whale’s belly, using a 1/4″ seam allowance for consistency.
Next, piece the tail. The tail might be made from triangles or curved pieces depending on the design. Take care to align your points and seams so the tail looks natural and connects smoothly to the body.
Attach the background pieces around the whale. These usually form a rectangular or square block and are essential for spacing the whale properly within the quilt layout. Use pins to hold pieces in place before stitching and press your seams flat as you go.
Now, add any details. This might include an eye, which can be embroidered, appliquéd, or created using a small fabric circle. Some designs also include water spouts, which add a fun and playful touch to the whale theme.
Check your block size. After assembling all pieces, your block should measure exactly as specified in your pattern—commonly 8″, 10″, or 12″ square. Trim any edges if necessary to ensure consistency across your quilt.
Finally, press the entire block again. A well-pressed block not only looks better but also makes assembling the quilt top easier. Use a light steam setting if your fabric allows and be gentle around curved or appliquéd sections.
3. Creative Variations and Project Ideas
The beauty of the Whale block – Pattern lies in how easily it can be adapted to different projects and creative visions. Whether you’re sewing for a child’s room, a beach house, or a themed quilt, this block offers endless versatility.
Consider creating an ocean-themed baby quilt by repeating the whale block across a grid layout. Add other sea life motifs like starfish, waves, or seaweed using appliqué or embroidery to build a complete scene.
Make a wall hanging. A single Whale block – Pattern, framed with borders and quilted with swirls to mimic water, makes a fantastic decorative wall piece for nurseries or ocean lovers. It’s quick, unique, and heartfelt.
For table décor, scale down the block and use it for placemats or fabric coasters. Use waterproof or insulated batting if you plan to place hot or cold items on them. It’s a fun way to add personality to your dining space.
Customize the color palette. While blue is the go-to for whales, you can experiment with purples, greens, or even patchwork whales using fabric scraps. This adds a playful twist and helps you use up leftover materials.
If you enjoy storytelling through fabric, try creating a row-by-row quilt with different scenes. The whale block can serve as the ocean section, surrounded by sun, clouds, boats, or beach elements. This type of quilt becomes a visual story.
You can also turn your Whale block – Pattern into a pillow. Add a coordinating border, quilt the top, and sew it to a backing with a zipper or envelope closure. It’s a great gift idea and brings a cozy, handmade touch to any sofa or bed.
4. Quilting, Finishing, and Maintenance Tips
Once you’ve completed your Whale block – Pattern, the next steps are quilting and finishing. Whether it’s part of a larger quilt or a stand-alone item, a polished finish is key to making your project shine.
If you’re making a quilt, begin by basting your layers—quilt top, batting, and backing—together. Use safety pins, spray adhesive, or hand basting to keep the layers secure while quilting.
Choose a quilting style that complements your whale design. Swirls, echo quilting, or wave-like free-motion quilting can all mimic water and enhance the theme of your block. Straight-line quilting also works for a clean, modern look.
After quilting, trim the edges and add your binding. Choose a fabric that ties in with your color scheme. Stripe or ombré bindings can add a bit of fun or movement to the finished edge.
If you’re making a smaller item like a pillow or wall hanging, consider using a simple envelope backing or binding with hanging loops. These methods are easy to sew and provide a clean finish.
Caring for your project is important, especially if it will be used often or gifted. Machine wash on a gentle cycle using cold water and mild detergent. Always test for colorfastness if using vibrant fabrics.
Press your project gently after washing. If it’s a quilt, store it flat or folded loosely to avoid creases. With the proper care, your Whale block – Pattern creation will stay fresh and beautiful for years to come.
FAQ – Frequently Asked Questions
What size is the typical Whale block – Pattern?
Most whale blocks range from 8″ to 12″ square, though you can scale the pattern up or down to fit your project.
Can beginners sew the Whale block – Pattern?
Yes! The whale block is great for beginners, especially if using a simple pattern. Curved pieces may require some practice, but the block is very forgiving.
Do I need to use applique or paper piecing?
Not necessarily. Many whale patterns are available in traditional patchwork format, but appliqué and paper piecing are also popular for added detail.
What types of fabric are best for this block?
100% cotton quilting fabric is ideal. Use contrasting fabrics for the whale and background so the design stands out clearly.
How can I personalize my whale block?
Try using novelty prints, adding embroidery, changing the whale’s color, or including extra design elements like waves, boats, or sea creatures.
Can I sell items made with the Whale block – Pattern?
If you designed the block or it’s a free-use pattern, yes. Always check the designer’s terms if you’re using a purchased pattern commercially.
Conclusion
The Whale block – Pattern is a delightful and versatile addition to any quilter’s toolbox. Whether you’re a beginner learning to piece your first design or a seasoned creator looking for something playful and fun, this pattern offers the perfect balance of simplicity and charm. From baby quilts to pillows, wall hangings, and more, the possibilities are endless.
We hope this guide has helped you
understand how to plan, sew, and finish your own Whale block – Pattern project. If you’ve tried it or plan to soon, please leave a sincere opinion or suggestion below. Your feedback supports the crafting community and helps others learn from your experience.
Happy sewing, and may your stitches make waves!