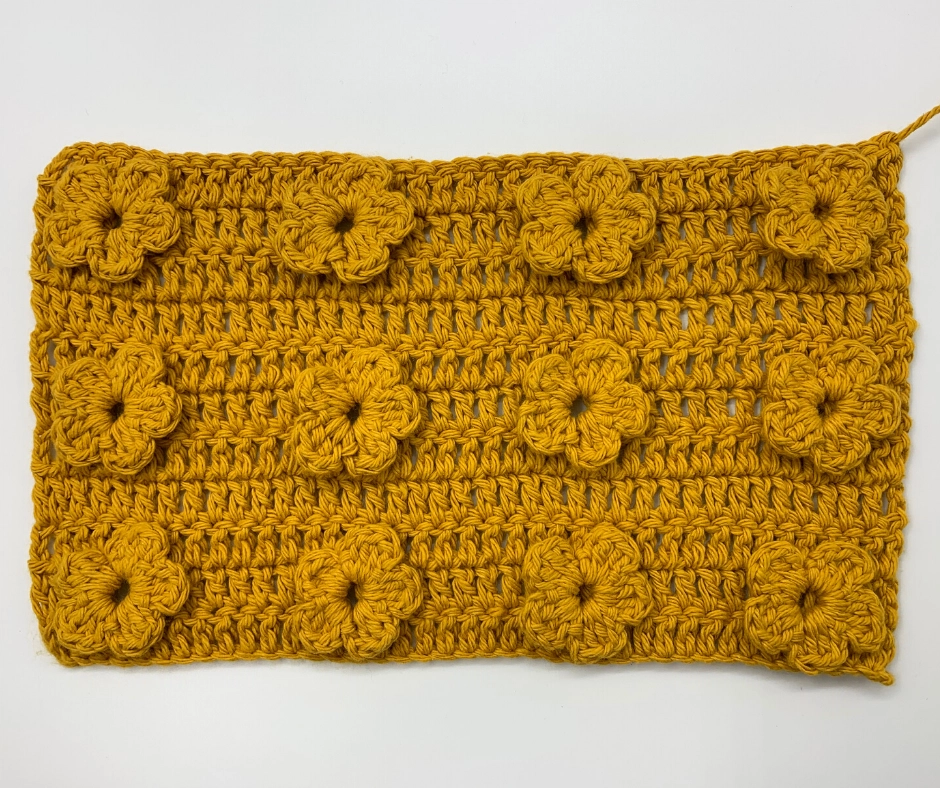
The Crochet 3D Flower Stitch – Crochet Pattern is a beautiful and creative way to add texture and dimension to your crochet projects.
This stitch creates stunning, three-dimensional flowers that stand out and can be incorporated into a variety of crochet items, such as blankets, scarves, hats, and bags.
If you love experimenting with new crochet techniques and adding a personal touch to your work, learning the Crochet 3D Flower Stitch is a must!
Crocheting three-dimensional flowers is not only fun, but it also opens up a world of possibilities for your crochet designs. With the 3D Flower Stitch, you can create intricate floral patterns that look more realistic and vibrant. This pattern is a great way to enhance your projects, whether you’re a beginner or an experienced crocheter. The beauty of this stitch lies in its versatility, allowing you to use it for various crochet patterns and designs.
In this article, we will dive into the steps to master the Crochet 3D Flower Stitch, explain the materials you’ll need, and share some helpful tips to get the best results. We will also explore different ways to incorporate this stitch into your crochet projects.
1. Materials and Tools Needed for the Crochet 3D Flower Stitch
To get started with the Crochet 3D Flower Stitch, it’s important to gather the necessary materials and tools. Here’s a list of what you will need:
- Yarn: You’ll need yarn in the colors of your choice. For the 3D Flower Stitch, it’s best to use medium-weight yarn, such as worsted weight yarn, to get the best texture and stitch definition.
- Crochet Hook: Choose a hook size that is appropriate for your yarn. For most worsted weight yarns, a size H (5.0mm) or I (5.5mm) crochet hook is commonly used.
- Scissors: You’ll need a sharp pair of scissors to trim your yarn once you’ve finished your stitches.
- Tapestry Needle: This will be useful for weaving in the ends of your yarn after you finish your project.
- Stitch Markers: These are optional but can be helpful for keeping track of your stitches and rows, especially if you’re working on a larger project.
- Measuring Tape: While not essential, a measuring tape can be helpful if you want to measure the size of your flowers or the overall dimensions of your project.
With your materials ready, let’s move on to the step-by-step process of creating the Crochet 3D Flower Stitch.
2. Step-by-Step Instructions for the Crochet 3D Flower Stitch
Learning the Crochet 3D Flower Stitch is easier than it might seem. Here’s how you can create your own 3D flowers with this technique:
- Start with a Magic Ring: Begin by making a magic ring (also called a magic circle) with your yarn. This will be the foundation for your 3D flower. If you’re not familiar with the magic ring technique, you can also chain 4 and join with a slip stitch to form a ring.
- Crochet the First Round: Into the magic ring, work 12 double crochet (dc) stitches. This will create the base of your flower. After completing the round, pull the magic ring tight to close the hole in the center.
- Start the Petals: To form the petals, you’ll need to work into the previous round. Begin by making a slip stitch to join the first double crochet stitch of the round. Then, chain 3, followed by a double crochet into the next stitch. This creates the first petal.
- Repeat for Each Petal: Continue creating petals by making chain 3, followed by a double crochet into the next stitch. Repeat this process for each stitch around the base. You should end up with 12 petals in total.
- Form the 3D Effect: To give the flower its three-dimensional look, you will use a technique called “puff stitch” to form the petal shapes. For each petal, you will yarn over, insert your hook into the stitch, yarn over again, and pull up a loop. Repeat this process three times before pulling through all loops on the hook.
- Finish the Flower: Once you’ve completed the petals, you can cut the yarn, leaving a tail long enough to sew in later. Use a tapestry needle to weave in any loose ends, and your Crochet 3D Flower Stitch is complete!
Now that you’ve learned the basic technique, let’s explore how you can incorporate the Crochet 3D Flower Stitch into your crochet projects.
3. Ideas for Incorporating the Crochet 3D Flower Stitch into Your Projects
The Crochet 3D Flower Stitch is a versatile technique that can be used in a wide variety of crochet projects. Here are some ideas to help inspire you:
- Crochet Blankets: Use the 3D flower stitch to create a floral-inspired blanket. You can crochet individual flowers and join them together to form a larger pattern, or add them as accents to a solid-colored blanket.
- Crochet Scarves: Adding 3D flowers to a scarf can make it look more stylish and unique. You can scatter flowers across the length of the scarf or use them to form a repeating pattern.
- Crochet Bags: Enhance your crochet bags by attaching 3D flowers to the surface. This technique can create a striking look for handbags, tote bags, or even small purses.
- Crochet Headbands or Hair Accessories: Crochet 3D flowers can be used to make headbands, hair clips, or even floral brooches. These accessories make great gifts or personal items to wear.
- Crochet Garments: Incorporate the 3D Flower Stitch into crochet garments, such as cardigans or sweaters, by adding flowers as embellishments along the neckline, sleeves, or hem.
- Crochet Pillows: Add a touch of whimsy to your home decor with crochet pillows featuring 3D flowers. This is a great way to liven up your living space with color and texture.
No matter what project you choose, the Crochet 3D Flower Stitch will make your work stand out and add a unique touch.
4. Tips for Mastering the Crochet 3D Flower Stitch
To get the best results with the Crochet 3D Flower Stitch, keep these tips in mind:
- Choose the Right Yarn: The thickness of your yarn will affect the size and shape of your flowers. For well-defined petals, use a medium-weight yarn like worsted weight. If you want smaller flowers, opt for lighter yarn.
- Practice Your Tension: Tension is important in crochet, especially when creating textured stitches. Make sure you’re not crocheting too tightly or too loosely to get even, consistent flowers.
- Experiment with Color: To make your 3D flowers pop, experiment with different color combinations. You can use multiple colors for the petals or create a single-color flower with a contrasting center.
- Use a Stitch Marker: If you’re new to crocheting in rounds, using a stitch marker can help you keep track of your starting point. This ensures that your flower maintains its symmetry.
- Work in a Spiral: When creating flowers in a continuous round, try to work in a spiral without joining each round with a slip stitch. This will help eliminate any gaps between rounds and create a more seamless flower.
- Don’t Rush: The Crochet 3D Flower Stitch requires a bit of patience and practice. Take your time and enjoy the process of creating beautiful, textured flowers for your crochet projects.
FAQ
1. Can I use the Crochet 3D Flower Stitch for beginner projects? Yes! While the Crochet 3D Flower Stitch might seem a bit advanced at first, it’s easy to learn with some practice. Beginners can start with small flowers before moving on to more complex patterns.
2. How do I attach the flowers to a project? To attach a flower to your project, simply sew it onto your fabric using a tapestry needle and yarn. You can also crochet the flowers directly onto your project as you go.
3. What’s the best way to finish off the flower? After finishing your 3D flower, use a tapestry needle to weave in the loose ends of yarn. You can also steam block your flowers to help them keep their shape.
4. Can I use a different stitch for the petals? Absolutely! While the puff stitch is commonly used to create 3D petals, you can experiment with other stitches like half-double crochet or treble crochet to achieve different effects.
5. How can I make my flowers larger or smaller? To change the size of your flowers, adjust the number of stitches in each round. You can also use different yarn weights and crochet hook sizes to vary the size of the flowers.
6. Can I add beads or other embellishments to the flowers? Yes! Adding beads, buttons, or other embellishments to the center of your flowers can give them extra detail and a more personalized look.
Conclusion
The Crochet 3D Flower Stitch – Crochet Pattern is a fun and creative way to add texture and beauty to your crochet projects. With just a few simple steps, you can create stunning flowers that are perfect for adding to blankets, scarves, bags, and more. By experimenting with colors and techniques, you can make your flowers as unique as your crochet style.
We hope you found this guide helpful in learning the Crochet 3D Flower Stitch! Please share your thoughts, questions, or suggestions in the comments below. We’d love to hear about your projects and how you’ve used this stitch in your own work!