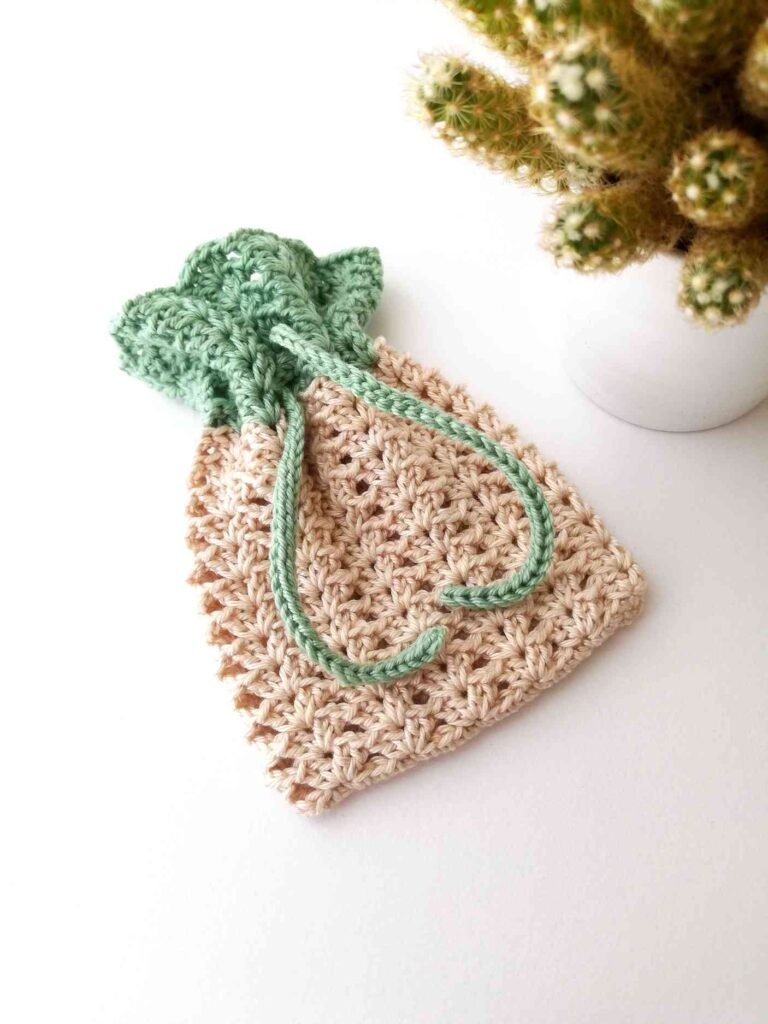
The Crochet Drawstring Bag Iris is a fantastic project for anyone looking to combine practicality with creativity.
Whether you are a seasoned crocheter or just beginning, this design offers a perfect balance of fun and functionality.
The Crochet Drawstring Bag Iris is designed to be both stylish and versatile, making it ideal for carrying everything from your knitting supplies to your everyday essentials.
With its sleek lines and charming details, this crochet bag is an excellent addition to any handmade collection.
In this article, we will walk you through everything you need to know to make the perfect Crochet Drawstring Bag Iris. From selecting the right materials to learning key techniques, we will cover it all. This bag is not only practical for storing personal items but can also be customized in various colors and textures to suit your style. If you enjoy working on crochet projects that allow for creativity while still having a functional outcome, the Crochet Drawstring Bag Iris is the perfect choice.
By the end of this guide, you will be able to confidently create your own Crochet Drawstring Bag Iris and understand how to make this design uniquely yours. Let’s dive into the steps and materials required to start crocheting this beautiful and functional accessory.
1. Materials Needed for the Crochet Drawstring Bag Iris
To get started with the Crochet Drawstring Bag Iris, you’ll need to gather a few essential materials. While this bag is a straightforward crochet project, having the right materials is key to ensuring it turns out as expected. Here’s a list of what you’ll need:
- Yarn: Choose a yarn that suits your preferred texture and weight. For the Crochet Drawstring Bag Iris, a medium-weight yarn (such as worsted weight) works best, as it gives the bag the perfect balance of sturdiness and softness. You can opt for cotton yarn for a more structured, durable bag, or a soft acrylic yarn for a more relaxed look.
- Crochet Hook: Select a crochet hook that matches the yarn you are using. Typically, a 5mm or 6mm hook works well for worsted weight yarn. The hook size will affect the overall size of your bag, so choose one that will give you the desired tension.
- Stitch Markers: Stitch markers are helpful to mark key points in the pattern, especially when working in rounds. This will help you keep track of your rows and ensure that your bag remains symmetrical.
- Drawstring: The drawstring is one of the most important features of this bag. You can either crochet a cord or use a pre-made ribbon or string. The drawstring should be strong enough to hold the bag closed securely, but also soft enough to slide easily through the bag’s casing.
- Tapestry Needle: A tapestry needle is used to weave in the ends of your yarn once you have completed the bag. It’s also helpful for sewing the drawstring into place.
- Scissors: Don’t forget your trusty pair of scissors for trimming yarn tails as you go along.
With these materials in hand, you’re ready to begin making your Crochet Drawstring Bag Iris. Now, let’s dive into the step-by-step instructions to bring this project to life.
2. Step-by-Step Instructions to Crochet the Drawstring Bag Iris
Creating the Crochet Drawstring Bag Iris is a fun and relatively simple project that involves basic crochet stitches. Here’s a step-by-step guide to help you along the way:
- Start with the Base: Begin by creating a magic ring to form the base of your bag. You will crochet in a spiral, working in continuous rounds. Start by making a chain and then work single crochet stitches into the ring, gradually increasing the number of stitches to form a flat, round base.
- Build Up the Sides: Once you’ve finished the base of the bag, continue crocheting in rounds without joining the rounds. You’ll be working in single crochet stitches to build the sides of the bag. Be sure to measure the height as you go along, ensuring that it’s tall enough for your needs.
- Shaping the Bag: To give the Crochet Drawstring Bag Iris its distinct shape, you will need to incorporate decreases as you crochet the sides. This helps to gradually bring the sides of the bag inward toward the top, where the drawstring will eventually go.
- Create the Casing for the Drawstring: Once you reach the desired height for the bag, you’ll crochet a few rows to form the casing where the drawstring will sit. This is typically done by working in a round, with a few more stitches, ensuring there’s enough space for the drawstring to pass through comfortably.
- Finishing Touches: When the body of the bag is complete, you’ll need to add the drawstring. Use a tapestry needle to thread your drawstring through the casing you’ve just created. You can either crochet a simple cord or use a pre-made string, making sure it is long enough to gather the top of the bag.
- Weave in Ends: Finally, weave in any loose yarn ends with your tapestry needle. This will give your bag a clean finish and prevent any unruly strands from getting caught.
Congratulations! You’ve now completed your Crochet Drawstring Bag Iris. It’s a functional and stylish accessory that you can use for a variety of purposes. The best part is that you can easily customize it with different yarns, colors, or patterns to make it your own.
3. Tips for Customizing Your Crochet Drawstring Bag Iris
While the basic Crochet Drawstring Bag Iris is simple and beautiful, there are plenty of ways to add your own personal touch. Here are some ideas for customizing your bag:
- Experiment with Colors: Choose colors that reflect your personal style or match your existing wardrobe. You can create a vibrant, multi-colored bag using several shades, or stick to a classic neutral palette for a timeless look.
- Add Embellishments: You can easily incorporate decorative elements into your bag. Try adding crochet flowers, tassels, or even beads to the drawstring for a unique look.
- Change the Stitch Pattern: If you want to add texture to your Crochet Drawstring Bag Iris, try using different crochet stitches. For example, you could use a half-double crochet stitch or a shell stitch to create a unique pattern on the bag.
- Size Adjustments: Depending on what you need the bag for, you can adjust the size by adding or reducing the number of rounds in the base or sides. Make a smaller version for carrying essentials, or a larger one to hold knitting projects or groceries.
- Use a Different Yarn Type: Although worsted weight yarn is a popular choice, you can experiment with different types of yarns. A chunky yarn will create a larger, more substantial bag, while a lighter cotton or linen yarn will give your bag a breezier, summery feel.
- Create a Lined Bag: For added durability and structure, you can line your Crochet Drawstring Bag Iris with fabric. Simply cut a piece of fabric to fit the inside of the bag and sew it in place using a hand-sewing needle.
4. Common Mistakes to Avoid When Making the Crochet Drawstring Bag Iris
While the Crochet Drawstring Bag Iris is relatively simple to make, there are a few common mistakes that beginners and even experienced crafters may encounter. Here are some tips to help you avoid those pitfalls:
- Incorrect Stitch Count: Make sure to count your stitches regularly to ensure you’re increasing and decreasing the correct number of stitches. If you lose count, it can cause the bag to become uneven.
- Tight Stitches: If your stitches are too tight, the bag may become stiff and difficult to work with. Conversely, if they’re too loose, the bag might lose its shape. Aim for a relaxed, consistent tension.
- Not Measuring Properly: To make sure the bag is the right size, take measurements as you go. The height and width should match your desired dimensions before you begin working on the casing for the drawstring.
- Forgetting to Add the Drawstring Casing: The casing is a crucial part of the Crochet Drawstring Bag Iris, as it holds the drawstring in place. Don’t forget to leave enough room for it, or your bag may not function as intended.
- Skipping the Weaving: Weaving in yarn ends is important for keeping the bag neat and tidy. Make sure to take the time to finish off any loose ends to prevent them from coming undone.
- Using the Wrong Yarn: The yarn you choose will affect the texture and durability of your bag. Opt for yarn that is sturdy enough to support the bag’s weight but also soft enough to handle comfortably.
FAQ
- What is a crochet drawstring bag used for? A crochet drawstring bag is a versatile accessory that can be used for a variety of purposes, including carrying personal items, knitting supplies, or even groceries. It’s a practical and stylish way to keep your belongings organized.
- Can I make a larger or smaller version of the Crochet Drawstring Bag Iris? Yes! You can easily adjust the size of the Crochet Drawstring Bag Iris by adding or subtracting rounds when working on the base and sides of the bag.
- How long should the drawstring be for the bag? The drawstring should be long enough to gather the top of the bag securely. A general rule of thumb is to make the draw
string twice the length of the bag’s circumference.
- Can I crochet the drawstring myself? Yes, you can crochet the drawstring yourself! Use a simple chain or a more intricate design to create a custom drawstring that fits your style.
- What kind of yarn should I use for the bag? A medium-weight yarn, such as worsted weight, works well for creating a sturdy yet soft crochet drawstring bag. You can experiment with different yarns to achieve different textures.
Conclusion
In this article, we’ve explored how to create the Crochet Drawstring Bag Iris, from gathering materials to customizing your design. This fun and practical project allows you to showcase your creativity while crafting a beautiful, functional accessory. Whether you’re a beginner or experienced crocheter, you can create your own version of the Crochet Drawstring Bag Iris with ease. Let us know your thoughts on the project and feel free to share any tips or suggestions you might have! Happy crocheting!