
Crochet hair accessory – Tutorial: If you are looking for a fun, creative, and rewarding way to elevate your everyday style, learning how to craft your own handmade hair pieces is the perfect place to start. In this comprehensive guide, we will dive deep into everything you need to know about creating beautiful, functional, and trendy pieces that add a touch of personality to any outfit. Whether you are a seasoned crafter looking for a quick weekend project or a complete beginner picking up a hook for the very first time, this step-by-step walkthrough is designed to help you succeed and inspire your next creative journey.
The beauty of a handmade crochet hair accessory lies in its incredible versatility and the endless opportunities for personalization. By simply changing your yarn weight, fiber type, or color palette, you can transform a single basic design into a vintage-inspired headband, a chic bohemian hair wrap, or a collection of playful scrunchies for everyday wear. Beyond the aesthetic appeal, making your own hair pieces allows you to choose soft, breathable, and high-quality materials that are gentle on your hair strands, reducing the friction and breakage often caused by store-bought plastic or metal alternatives.
Throughout this extensive crochet hair accessory – tutorial, we will break down the essential stitches, discuss the best material selections, and provide expert tips to ensure your finished projects look entirely professional and hold up beautifully over time. Crafting your own wardrobe accents is not just about the final product; it is a mindful, relaxing practice that allows you to slow down and channel your inner creativity. Grab your favorite yarn, find a comfortable spot to sit, and let us explore how easy and fulfilling it is to bring these charming, stitch-by-stitch creations to life.
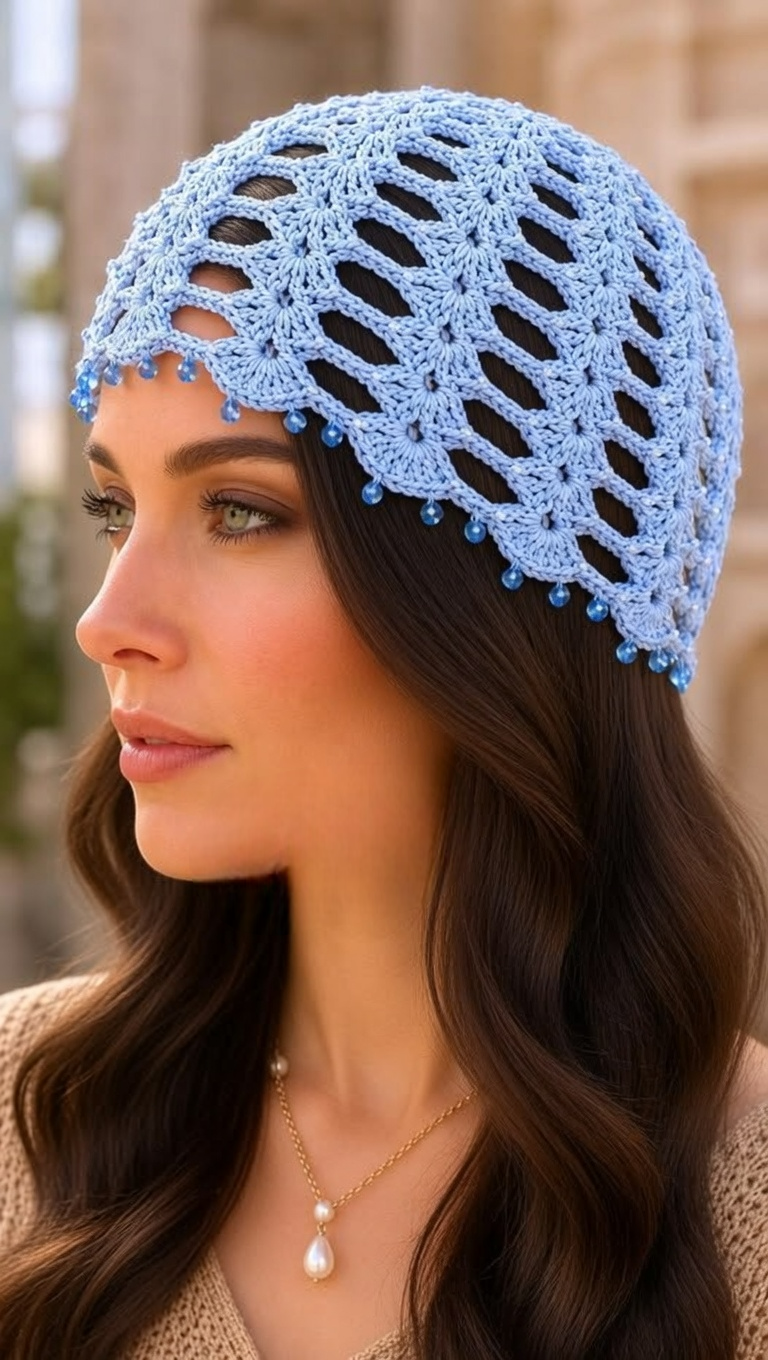
1 Choosing the Best Materials for Your Crochet Hair Accessory
When planning your very first project, selecting the right yarn is the foundation of a successful, long-lasting piece. For a comfortable crochet hair accessory, you generally want to look for lightweight fibers that offer a balance of softness, durability, and slight elasticity. Cotton yarn is a highly recommended choice among seasoned crafters because it provides excellent stitch definition, does not pill easily, and can be washed frequently without losing its structural integrity.
If you prefer a softer texture with a bit more drape, high-quality acrylic blends or bamboo yarns are fantastic alternatives to consider. Bamboo offers a luxurious, silky sheen that looks beautiful in the sunlight, making it ideal for elegant headbands and delicate floral clips. Avoid overly chunky or heavy wool yarns for this specific type of project, as they can become weighed down, slip off your head easily, or feel uncomfortably hot during warmer seasons.
Equally important to your yarn selection is choosing the correct crochet hook size to match your chosen fiber. For hair items, working with a slightly smaller hook than what is recommended on the yarn label can create a tighter, more secure fabric. A tighter stitch tension ensures that your hairpins, clips, or elastic bands do not peek through the gaps of your stitches, giving your work a much cleaner and more professional look.
In addition to your yarn and hook, you will need a few basic notions to complete your work successfully. Keep a sharp pair of embroidery scissors, a sturdy tapestry needle for weaving in loose ends, and the foundational hardware like blank metal hair slides, snap clips, or seamless elastic hair ties nearby. Having these materials organized and ready before you begin will make the entire crafting process seamless, enjoyable, and efficient.
When sourcing your hardware, look for premium, snag-free options that will not catch on your hair or the yarn itself. If you are making a scrunchie, choosing high-quality, durable elastic bands ensures that your finished item retains its stretch and bounce even after months of continuous use. Taking the time to select premium foundational materials ensures that your handmade creations look less like a beginner experiment and more like a high-end boutique find.
Ultimately, experimenting with different color combinations and yarn textures is where the real fun begins. You can choose neutral tones to match your daily wardrobe, or opt for bright, vibrant variegated yarns to make a bold fashion statement. By understanding how different materials behave together, you set yourself up for a truly rewarding experience as you follow along with this comprehensive crochet hair accessory – tutorial.
2 Essential Stitches for Creating Beautiful Hair Pieces
Mastering a few foundational stitches is all it takes to create a stunning variety of unique items. The single crochet stitch is the absolute backbone of many hair projects because it creates a dense, sturdy fabric that holds its shape incredibly well. This specific stitch is perfect for covering elastic hair ties or creating the solid base of a structured headband where you do not want any gaps or stretching.
If you want to add a bit more texture, height, and flexibility to your work, the half double crochet is an excellent stitch to incorporate. It offers a softer ridge and a lovely drape, making it perfect for comfortable, wide ear-warmers or vintage-style head wraps. It works up relatively quickly, allowing you to finish a complete project in just a single sitting while still maintaining a cohesive, polished look.
For a more delicate, airy, and romantic aesthetic, the double crochet stitch can be used to form beautiful lace patterns, scallops, and shells. This stitch is highly effective when creating decorative borders around simpler bases or making lightweight summer kerchiefs. Because it is taller, it creates a flexible fabric that conforms comfortably to the shape of your head without feeling restrictive.
Another fantastic technique to explore in this crochet hair accessory – tutorial is working exclusively in the back loops only of your stitches. This simple modification creates a beautiful, stretchy ribbed texture that mimics the appearance of knitted fabric. Ribbing is incredibly useful for headbands because it allows the finished piece to stretch comfortably over your head and then snap back into place securely.
As you gain confidence with the basic stitches, you can start combining them to create intricate shapes like flowers, leaves, and geometric motifs. These small embellishments can be crocheted separately and then sewn securely onto plain headbands or metal snap clips. This modular approach allows you to customize simple bases into elaborate, eye-catching works of art with very little extra effort.
No matter which stitch pattern you decide to choose, maintaining a consistent stitch tension throughout your work is the key to a professional finish. Try not to pull your yarn too tightly, as this can make the fabric stiff, but avoid making your loops too loose, or the accessory might slip out of place. With a little bit of practice, your hands will naturally find the perfect rhythm for creating flawless, even stitches.
3 Step-by-Step Guide to Crafting a Trendy Scrunche
To begin your practical project, we will walk through the steps of creating a classic, beginner-friendly ruffled scrunchie. Start by taking a simple, seamless elastic hair tie and attaching your chosen yarn to it using a secure slip knot. Insert your hook through the center of the elastic band, yarn over, and pull up a loop, then work a series of single crochets directly around the entire elastic ring.
The secret to achieving a beautifully full, ruffled look is to pack as many single crochet stitches around the elastic band as possible. As you work your way around, gently slide the stitches closer together along the elastic to compress them, making room for even more stitches. Once the entire rubber band is completely covered and you can no longer see the elastic peeking through, join your last stitch to the first one with a neat slip stitch.
For the second round, chain two to gain height, and then work three double crochets into every single stitch from the previous round. By dramatically increasing the number of stitches in this round, the fabric will naturally begin to bunch up, create waves, and form the iconic, voluminous ruffle appearance. Continue this exact pattern all the way around the circle, ensuring you do not accidentally skip any stitches.
If you would like an even larger, more dramatic scrunchie, you can add a third round to your project. For this optional round, you can place one half double crochet into each stitch around, or choose a contrasting color of yarn to create a beautiful, distinctive border. This extra layer adds depth to the design and allows you to experiment with playful color blocking.
Once you have completed your desired number of rounds, cut your yarn, leaving a tail of about six inches for finishing. Pull the yarn tail completely through the final loop on your hook to secure the work and prevent it from unraveling. Thread this yarn tail onto your tapestry needle and carefully weave it back and forth through the dense stitches of the first round to hide it completely.
Gently stretch and fluff your brand-new, completed scrunchie to distribute the gorgeous ruffles evenly around the elastic core. You now have a stylish, functional, and completely customized piece that is ready to wear or gift to a friend. This simple design is the perfect example of how quickly you can achieve stunning results by following a well-structured crochet hair accessory – tutorial.
4 Professional Finishing Techniques and Care Tips
The difference between an amateur craft project and a boutique-quality item often comes down to the final finishing details. After you finish crocheting, taking the time to block your work can make an incredible difference in the final appearance. Wet blocking involves gently soaking your finished piece in lukewarm water with a drop of mild soap, pressing out the excess moisture in a towel, and pinning it to shape until dry.
Blocking relaxes the yarn fibers, evens out any minor inconsistencies in your stitch tension, and allows lace patterns to open up beautifully. This step is particularly important for wide headbands, hair wraps, and intricate floral motifs that need to lay flat and smooth against your hair. It gives the fabric a professional drape and crisp edges that instantly elevate the overall quality of your work.
When it comes to attaching your fabric pieces to metal hardware like clips or slides, using the right adhesive technique is vital. While hot glue can work for quick fixes, a high-quality, flexible fabric glue or a specialized craft adhesive like E6000 offers a much stronger, longer-lasting bond. For the absolute most secure hold, consider sewing the piece directly onto the hardware using matching thread whenever the design allows.
Proper care and maintenance will keep your handmade items looking brand new and vibrant for many years to come. Because these items come into frequent contact with natural hair oils, styling products, and everyday dust, they will eventually need to be cleaned. Always prefer hand washing your pieces in cool water with a gentle, pH-neutral detergent to prevent the fibers from fuzzing up or shrinking.
Never wring, twist, or scrub your handmade pieces aggressively, as this can distort the delicate stitches and ruin the shape. Instead, gently squeeze the soapy water through the fabric, rinse thoroughly with clean water, and roll the item inside a clean towel to absorb the moisture. Lay the item completely flat on a dry towel away from direct sunlight and heat sources to dry naturally.
Store your collection in a clean, dry organizer box or hang your headbands neatly on a dedicated display rack to prevent them from getting crushed or stretched out of shape. Taking proper care of your creations ensures that the time, love, and effort you invested into this crochet hair accessory – tutorial continues to bring joy and style to your daily routine for a very long time.
Frequently Asked Questions
What is the best yarn type to use for a crochet hair accessory?
The best yarn choice for hair items is 100% cotton or a high-quality cotton blend. Cotton is durable, breathable, has excellent stitch definition, and does not pill or fuzz easily after repeated wear and washing. Bamboo yarn is also an excellent option if you want a luxurious, smooth sheen with a beautiful drape, while lightweight acrylics work well for quick, everyday projects.
How do I stop my handmade headbands from slipping off my head?
To prevent headbands from sliding off, you can incorporate a stretchy ribbed pattern by working your stitches into the back loops only. Additionally, making the headband slightly smaller than your actual head circumference ensures a snug fit. You can also sew a small strip of velvet ribbon, fabric lining, or a few drops of clear silicone grip onto the inside surface of the band to create gentle friction against your hair.
Can absolute beginners succeed with this crochet hair accessory – tutorial?
Yes, absolutely. Hair items are among the best projects for beginners because they are small, work up very quickly, and typically use basic foundational stitches like the single, half double, and double crochet. Starting with a simple project like a ruffled scrunchie allows beginners to practice stitch consistency, learn how to work around an elastic core, and achieve a beautiful, functional result without feeling overwhelmed.
How do I securely attach my crochet pieces to metal hair clips?
For a secure and permanent bond, using a strong, flexible craft adhesive like E6000 or specialized fabric glue is highly recommended over standard hot glue, which can become brittle and peel off metal over time. For maximum security, you can also wrap the metal clip with a matching strand of yarn or a thin strip of fabric first, then sew your piece directly onto that wrapped base using a tapestry needle and thread.
Are these handmade hair pieces safe to wash in a washing machine?
While some cotton and acrylic yarns are machine washable, it is always best to hand wash your handmade hair items to preserve their shape and longevity. Machine washing can cause friction, leading to pilling, fuzzing, or stretching of the delicate stitches. Gently hand washing in cool water with a mild soap and laying the item completely flat to dry will keep your pieces looking pristine and new for a much longer time.
Conclusion
In this detailed guide, we have explored the entire creative process of designing and making a beautiful, personalized crochet hair accessory. From selecting the perfect lightweight cotton and bamboo yarns to mastering essential stitches like the single and double crochet, you now possess the foundational knowledge needed to create boutique-quality hair pieces.
We also covered the step-by-step process for making a trendy ruffled scrunchie, along with professional finishing and care techniques that ensure your creations remain durable, vibrant, and stylish for a long time to come.