If you are looking for a comprehensive Crochet Vest – Tutorial, you have come to the right place to start your creative journey into handmade fashion. Learning how to craft a crochet vest is a rewarding experience that combines utility with personal style, allowing you to create a versatile wardrobe staple that works for every season. Whether you are a seasoned pro or a complete beginner, following a structured tutorial ensures that your final product looks professional, fits perfectly, and lasts for years to come.
The beauty of a Crochet Vest – Tutorial lies in its adaptability, as you can easily customize the length, stitch pattern, and yarn weight to suit your specific taste. In recent years, the crochet vest has made a massive comeback in the fashion world, appearing on runways and in street style as a key layering piece. By mastering this tutorial, you are not just making a garment; you are engaging in a sustainable fashion practice that honors the slow-made movement and allows for endless creative expression.
In this guide, we will break down the essential components of the Crochet Vest – Tutorial, focusing on the materials you need, the foundational stitches, and the assembly process. We will prioritize SEO optimized tips to help you understand the mechanics of garment construction while keeping the tone light and encouraging. Get your hooks ready and your favorite yarn nearby, because we are about to dive deep into the world of crochet design and wearable art.
1. Choosing the Right Materials for Your Crochet Vest – Tutorial
Selecting the perfect yarn is the first and most crucial step in any Crochet Vest – Tutorial. For a classic vest, a medium-weight cotton or acrylic blend is often recommended because it provides excellent stitch definition and durability. If you want a more bohemian look, you might opt for a lightweight linen yarn that drapes beautifully against the body.
The hook size you choose will directly impact the “drape” or stiffness of your crochet vest. Most tutorials suggest a size H/5.00mm hook for worsted weight yarn, but you should always check your gauge before starting. A gauge swatch ensures that your vest won’t end up being three sizes too big or too small once finished.
Don’t forget the small but essential notions that make this Crochet Vest – Tutorial easier to follow. You will need a tapestry needle for weaving in ends, sharp scissors, and plenty of stitch markers. Stitch markers are especially helpful for identifying the armholes and neckline, preventing mistakes that are hard to fix later.
Understanding yarn fiber content is a key part of this tutorial. Natural fibers like wool are warm and elastic, making them great for winter vests, while plant-based fibers are breathable for summer wear. Think about when you plan to wear your crochet vest before you make your final purchase at the craft store.
Texture also plays a role in the aesthetic of your project. Some crochet vest tutorials call for “fuzzy” mohair yarns to create a soft, ethereal look, while others use mercerized cotton for a crisp, clean finish. The choice of material transforms the vibe of the entire crochet piece, so choose a color that complements your existing wardrobe.
Finally, keep your budget in mind as you start this Crochet Vest – Tutorial. While luxury hand-dyed yarns are stunning, many affordable “big box” yarns work beautifully for garments. The goal is to create something you feel confident wearing, so prioritize a texture that feels comfortable against your skin and a color that makes you smile.
2. Mastering the Basic Stitches and Pattern Foundation
Every great Crochet Vest – Tutorial relies on a few fundamental stitches that form the backbone of the design. Typically, you will use the chain stitch (ch), single crochet (sc), and double crochet (dc) to build the fabric of your vest. These stitches are versatile and allow for a quick build-up of rows, making the project feel fast and satisfying.
To start your crochet vest, you will usually begin with a foundation chain that matches the width of your back panel. Many modern tutorials suggest using a “foundation double crochet” instead of a standard chain because it provides more stretch. This ensures that the bottom of your vest doesn’t feel too tight or restrictive when you put it on.
The “body” of the vest in this Crochet Vest – Tutorial can be worked in one solid piece or three separate panels (one back and two fronts). Working in panels is often easier for beginners because it allows you to focus on simple rectangles before moving on to shaping. This modular approach is a hallmark of a beginner-friendly crochet guide.
As you progress through the tutorial, you might encounter the “moss stitch” or “granny stitch” variations. These patterns add visual interest and texture to your crochet vest without being overly complicated. Texture is a great way to hide minor imperfections in your tension, which is a common concern for those new to garment making.
Increasing and decreasing are the “magic” steps in any Crochet Vest – Tutorial. These techniques allow you to shape the V-neck or the rounded armholes. While it might seem intimidating, decreasing simply involves crocheting two stitches together (sc2tog or dc2tog) at the edges of your work to create a sloped effect.
Consistency is the secret to a professional-looking crochet vest. Try to maintain an even tension throughout the entire tutorial process so that your panels match up perfectly during assembly. If you find yourself getting tired, take a break; forced stitches often result in a tighter gauge that can skew the shape of your garment.
3. Assembling the Panels and Finishing Touches
Once you have completed your panels according to the Crochet Vest – Tutorial, it is time for the assembly phase. This is where your flat pieces of crochet fabric finally transform into a wearable garment. Most makers prefer the “mattress stitch” or a simple slip stitch join to connect the shoulders and sides of the vest.
Before sewing everything together, it is highly recommended to “block” your pieces. Blocking involves wetting your crochet panels and pinning them to specific measurements to set the shape. This step, often overlooked in basic tutorials, gives your crochet vest a polished, high-end look and ensures the edges don’t curl.
In this Crochet Vest – Tutorial, we focus on the importance of the shoulder seams. The shoulders carry the weight of the entire garment, so they must be reinforced. Using a sturdy seaming technique ensures that your crochet vest won’t stretch out of shape or sag over time with regular wear.
After the sides are joined, you can add a “ribbed” border to the bottom and the armholes. This is usually done using front-post and back-post double crochets (fpdc/bpdc). Ribbing adds a professional “knit-look” finish to your crochet project and helps the vest sit comfortably against your hips and waist.
The neckline is the focal point of your Crochet Vest – Tutorial. You can leave it as a simple raw edge for a minimalist look or add a few rows of single crochet to create a sturdy collar. If you want a more decorative finish, a “picot” border or a simple “crab stitch” (reverse single crochet) can add a lovely feminine touch.
Finally, we reach the stage of weaving in the ends. Use your tapestry needle to hide any loose yarn tails inside the stitches of your crochet vest. This ensures that your work won’t unravel and looks just as good on the inside as it does on the outside—a true mark of a successful tutorial completion.
4. Styling and Caring for Your Handmade Crochet Vest
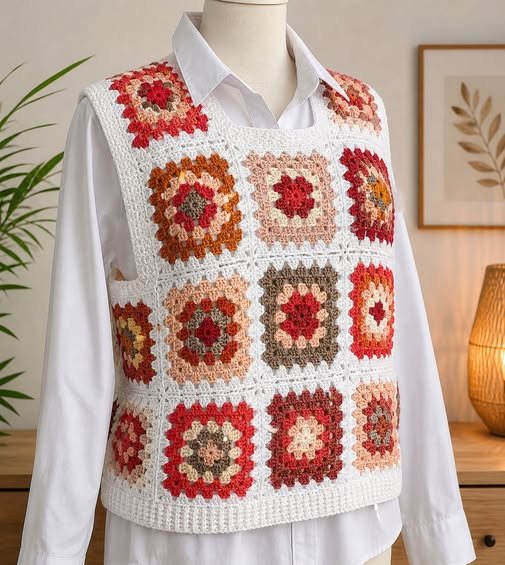
Now that you have finished the Crochet Vest – Tutorial, it is time to integrate this piece into your daily outfits. A crochet vest looks fantastic layered over a crisp white button-down shirt for an academic, “preppy” look. Alternatively, you can wear it over a simple t-shirt or even a dress to add a pop of color and texture.
One of the best things about the crochet vest is its versatility across different aesthetics. For a “cottagecore” vibe, choose earthy tones like sage green or rust. For a more modern, “streetwear” style, try using bright, neon colors or bold geometric patterns as suggested in many contemporary tutorials.
Proper care is essential to keep your crochet creation looking new. Always check the yarn label for washing instructions, but as a general rule, hand-washing your crochet vest in cool water with a mild detergent is the safest bet. Never wring out the water; instead, roll it in a towel to remove excess moisture.
Drying your vest flat is a non-negotiable rule in this Crochet Vest – Tutorial. Hanging a wet crochet garment will cause the fibers to stretch downward due to the weight of the water, permanently ruining the fit. By laying it flat on a drying rack, you preserve the integrity of the stitches and the overall silhouette.
If your crochet vest develops “pills” (small fuzz balls) over time, you can gently remove them with a fabric shaver. This is normal for natural fibers and some acrylics. Regular maintenance ensures that the effort you put into following this tutorial continues to pay off for years of stylish wear.
Lastly, don’t be afraid to experiment with accessories. You can add buttons to the front of your crochet vest or even a crochet belt to cinch the waist. The skills you learned in this tutorial are just the beginning; use them as a foundation to create even more complex and beautiful crochet garments in the future.
FAQ – Frequently Asked Questions
1. How long does it take to complete this Crochet Vest – Tutorial?
Depending on your skill level and the complexity of the stitch, a crochet vest typically takes between 10 to 20 hours to complete. Beginners might take a bit longer to ensure their gauge is correct.
2. Can I use any type of yarn for a crochet vest?
While you can use most yarns, “worsted weight” (category 4) is the most common recommendation in a Crochet Vest – Tutorial. It provides the best balance between speed of making and wearable weight.
3. Is this tutorial suitable for absolute beginners?
Yes! If you know how to do a chain, single crochet, and double crochet, you can follow this tutorial. The vest is mostly made of rectangular panels, which are very beginner-friendly.
4. How much yarn do I need for a standard-sized vest?
For a medium-sized crochet vest, you will generally need between 600 to 900 yards of yarn. Always buy an extra skein to ensure you don’t run out mid-project, as dye lots can vary.
5. How do I make the vest larger or smaller?
To adjust the size in this Crochet Vest – Tutorial, you simply add or subtract rows from your panels. Measuring a vest you already own that fits well is the best way to determine your target dimensions.
6. Do I need to block my crochet vest?
While not strictly mandatory, blocking is highly recommended. It smooths out the stitches and ensures the crochet panels lay flat, giving your garment a much more professional appearance.
Conclusion
In this Crochet Vest – Tutorial, we have covered everything from selecting the right yarn and tools to the technical aspects of stitch work, assembly, and garment care.
By focusing on high-quality materials and consistent tension, you have learned how to create a beautiful, functional crochet vest that reflects your unique style. Remember that crochet is a journey of patience and creativity, and every stitch you make is a step toward mastering this timeless craft. We hope this tutorial has inspired you to pick up your hook and start your next favorite project.