Creating a Patchwork Jacket – Tutorial is one of the most rewarding ways to dive into the world of sustainable fashion and high-end textile art. By combining various fabric scraps into a cohesive garment, you aren’t just making a piece of clothing; you are crafting a wearable story that reflects your personal style and creative journey. This Patchwork Jacket – Tutorial aims to guide you through the intricate yet meditative process of assembling a unique outer layer that stands out in a world of mass-produced fast fashion.
The beauty of following a Patchwork Jacket – Tutorial lies in the versatility of the materials you can use. Whether you are repurposing vintage linens, using up leftovers from previous quilting projects, or upcycling old denim, the Patchwork Jacket – Tutorial approach ensures that no two pieces are ever the same. Many enthusiasts find that a Patchwork Jacket – Tutorial is the perfect bridge between traditional quilting techniques and modern garment construction, allowing for a high level of artistic expression.
To get the most out of this Patchwork Jacket – Tutorial, it is essential to focus on both the aesthetic arrangement of your fabrics and the structural integrity of the finished piece. In this comprehensive guide, we will explore everything from selecting the right textiles to mastering the sewing machine settings required for thick layers. By the end of this Patchwork Jacket – Tutorial, you will have the knowledge and confidence to assemble a professional-looking garment that feels cozy, looks stunning, and serves as a testament to your handiwork.
1. Selecting the Perfect Fabrics for Your Patchwork Jacket – Tutorial
The foundation of any successful Patchwork Jacket – Tutorial starts with the selection of materials. You want to choose fabrics that share a similar weight so that the jacket hangs evenly on the body. Using a mix of cotton calico, flannel, and even linen can provide a wonderful tactile experience, but ensure they are pre-washed to avoid uneven shrinking later.
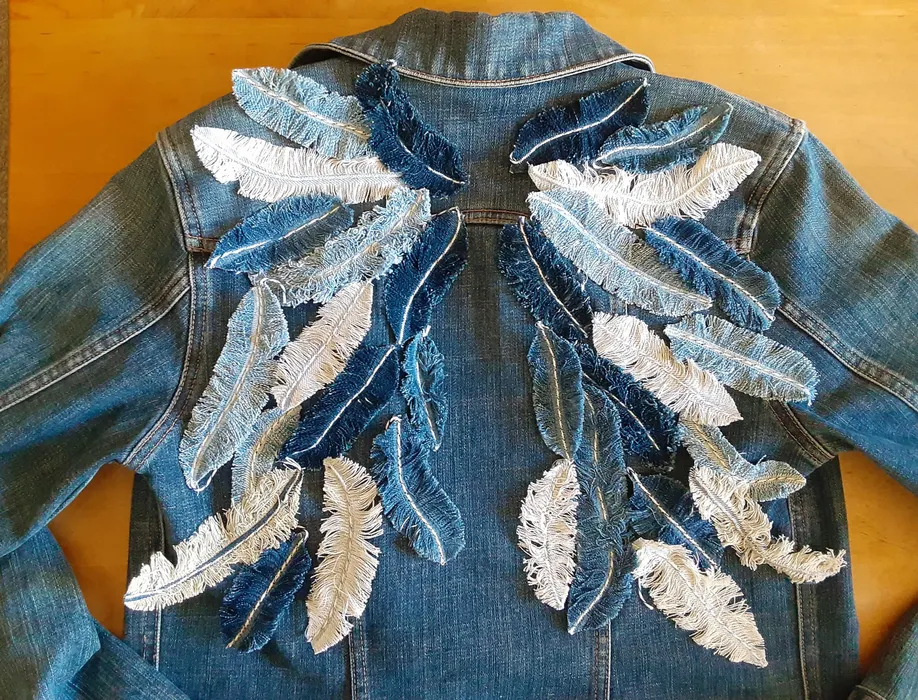
Color theory plays a massive role in this Patchwork Jacket – Tutorial. You might decide to go with a monochromatic theme, using various shades of blue, or a vibrant bohemian style with clashing patterns. Laying your scraps out on a large table or the floor before you start sewing is a crucial step in the Patchwork Jacket – Tutorial process to visualize the final balance.
Don’t overlook the importance of the lining fabric. Since a patchwork shell can have many exposed seams on the inside, a soft silk or brushed cotton lining will make your jacket comfortable to wear. This Patchwork Jacket – Tutorial emphasizes that the interior finish is just as important as the exterior appearance for a professional result.
In this Patchwork Jacket – Tutorial, we also encourage the use of upcycled denim. Old jeans are incredibly durable and provide a sturdy base for a structured jacket. Mixing denim with lighter floral prints creates a beautiful contrast that is very popular in current DIY fashion trends and sustainable wardrobe movements.
Texture is another element to consider during your Patchwork Jacket – Tutorial journey. Incorporating small pieces of corduroy or velvet can add depth to your design. However, be mindful that thicker fabrics might require a heavy-duty needle in your sewing machine to prevent skipped stitches or broken threads.
Finally, keep your seam allowances consistent. Most Patchwork Jacket – Tutorial experts recommend a standard 1/4 inch seam for the patchwork blocks. This consistency ensures that your panels line up correctly when it comes time to assemble the front, back, and sleeves of your garment.
2. Essential Tools and Pattern Preparation for a Patchwork Jacket – Tutorial
Before you begin the actual sewing in this Patchwork Jacket – Tutorial, you need to gather the right tools. A sharp rotary cutter, a self-healing cutting mat, and a quilting ruler are indispensable for getting those precise square or rectangular shapes. Precision in cutting is the “secret sauce” of a high-quality Patchwork Jacket – Tutorial outcome.
You will also need a reliable sewing pattern for a simple boxy jacket or a kimono-style coat. For beginners following a Patchwork Jacket – Tutorial, a pattern with fewer darts and complex curves is much easier to manage. You will essentially be creating “fabric sheets” out of your patches and then cutting your pattern pieces from those sheets.
Thread choice is another vital component of our Patchwork Jacket – Tutorial. Use a high-quality polyester or cotton thread that matches your dominant fabric color. Since there is a lot of “seam stress” in a patchwork garment, choosing a strong thread ensures that your Patchwork Jacket – Tutorial project lasts for years of wear.
Marking tools, such as tailor’s chalk or water-soluble pens, are necessary for tracing your pattern onto your newly created patchwork fabric. In this Patchwork Jacket – Tutorial, we suggest marking the grainline clearly so that your jacket doesn’t twist or pull awkwardly once it is fully assembled and worn.
Interfacing can be a game-changer in a Patchwork Jacket – Tutorial. If your patches are particularly lightweight, applying a thin fusible interfacing to the back of the completed patchwork panels can add the necessary body. This step helps the jacket maintain its shape, especially around the collar and buttonholes.
Lastly, make sure your iron and ironing board are ready. Every single seam in this Patchwork Jacket – Tutorial must be pressed flat. Pressing is the difference between a “homemade” look and a “handmade” designer look. For the best results, press your seams to one side or open them up to reduce bulk.
3. Assembling the Patchwork Panels and Sewing the Garment
Now we reach the heart of the Patchwork Jacket – Tutorial: sewing the patches together. Start by creating small rows of squares and then join those rows into larger blocks. This systematic approach in the Patchwork Jacket – Tutorial prevents the fabric from becoming too unwieldy as you work under the arm of the sewing machine.
Once you have created enough patchwork fabric to cover your pattern pieces, lay the pattern down and cut carefully. This stage of the Patchwork Jacket – Tutorial requires a bit of bravery, as you are cutting into the beautiful “quilt” you just made. Remember to leave enough space for hem allowances at the bottom and the cuffs.
Joining the shoulders is the first step in the actual garment assembly of this Patchwork Jacket – Tutorial. This creates the frame of the jacket. Use wonder clips or pins to hold the layers together, as patchwork can be quite thick and prone to shifting. Double-stitch these high-stress areas for extra durability.
Attaching the sleeves can be the trickiest part of any Patchwork Jacket – Tutorial. We recommend the “flat-sleeve” method, where you attach the sleeve to the shoulder before sewing the side seams. This technique is much more manageable when dealing with the bulk of a quilted or patchwork textile.
The side seams come next in our Patchwork Jacket – Tutorial. Sew from the wrist, up the arm, and down the side of the body in one continuous motion. This creates a clean finish. If you are adding pockets, ensure they are aligned perfectly on both sides before closing the side seams.
The final construction step in this Patchwork Jacket – Tutorial is finishing the edges. You can use bias tape for a clean, colorful “Hong Kong finish” on the inside, or simply hem the edges with a traditional fold. Adding buttons or a zipper completes the functional aspect of your handcrafted masterpiece.
4. Customization and Maintenance of Your Handcrafted Masterpiece
A Patchwork Jacket – Tutorial isn’t complete without discussing the finishing touches. You can add hand-stitched embroidery or Sashiko details over certain patches to give it an even more artisanal feel. These small details are what truly elevate the Patchwork Jacket – Tutorial from a simple project to a work of art.
If you want a warmer garment, this Patchwork Jacket – Tutorial can be adapted into a quilted jacket. Simply add a layer of batting between your patchwork shell and the lining. You can then “quilt” the layers together with straight lines or free-motion patterns to add structure and warmth.
Labeling your work is a proud moment in any Patchwork Jacket – Tutorial. Consider sewing in a “Handmade by…” tag. Since you’ve put hours of labor into this Patchwork Jacket – Tutorial, you deserve to have your name associated with such a complex and beautiful creation.
When it comes to care, a jacket made via a Patchwork Jacket – Tutorial should be treated with love. Hand washing or using a delicate cycle in a laundry bag is usually best. Air drying is highly recommended to preserve the fibers and the integrity of the many seams you worked so hard on.
Storing your jacket on a padded hanger will help it keep its shape. Because of the weight of the patches, thin wire hangers can cause “shoulder bumps.” This Patchwork Jacket – Tutorial advises proper storage to ensure that the seam junctions don’t stretch over time.
Finally, remember that the most important part of this Patchwork Jacket – Tutorial is the joy of creation. Don’t worry if every corner isn’t perfectly matched; the “imperfections” are what give patchwork its soul. Your Patchwork Jacket – Tutorial journey is a celebration of color, texture, and your own unique creative voice.
FAQ – Frequently Asked Questions
How much fabric do I need for a Patchwork Jacket – Tutorial?
Generally, you will need the equivalent of 3 to 4 yards of fabric. However, because you are using scraps, it is better to measure the total surface area of your pattern pieces and add 20% for seam allowances and waste.
Can a beginner complete a Patchwork Jacket – Tutorial?
Yes! While it looks complex, a Patchwork Jacket – Tutorial is just a series of simple straight seams. If you can sew a straight line and follow a basic garment pattern, you can definitely make a beautiful jacket.
What is the best needle size for sewing a patchwork jacket?
A size 90/14 or 100/16 universal needle is usually best. If you are using a lot of denim or heavy canvas in your Patchwork Jacket – Tutorial, a denim needle will help penetrate the multiple layers without breaking.
Do I have to use a lining in my patchwork jacket?
While not strictly required, a lining is highly recommended. It protects the back of your patchwork seams from fraying and makes the jacket much easier to slide on and off over other clothes.
How do I prevent my patches from fraying?
Using a small stitch length (2.0mm) helps secure the threads. Additionally, once you finish the patchwork “sheet,” you can zigzag the edges or use a serger before cutting your pattern pieces to keep everything tidy.
Can I use stretchy fabrics like jersey in a patchwork jacket?
It is best to stick to woven fabrics for your first Patchwork Jacket – Tutorial. Stretchy fabrics require different tensions and techniques, and mixing stretch with non-stretch can cause the jacket to pucker and lose its shape.
Conclusion
This Patchwork Jacket – Tutorial has covered the essential steps to transform simple fabric scraps into a high-fashion, sustainable garment. We have explored the importance of fabric selection, the precision required in cutting, the systematic assembly of panels, and the final touches that make a jacket truly yours.
By following this Patchwork Jacket – Tutorial, you have learned how to combine the traditional art of quilting with modern garment construction to create something both functional and beautiful. We hope this guide inspires you to look at your fabric stash with new eyes and start your own creative journey.