A Heart Keychain Crochet – Tutorial is one of the most delightful, rewarding, and quick crafting projects you can dive into today. Whether you are an absolute beginner or a seasoned fiber artist, creating a handmade keychain is a fantastic way to use up leftover yarn scraps while making something beautiful and functional. This comprehensive guide will take you step-by-step through the process, ensuring you can craft a stunning piece that works perfectly as a personal accessory, a heartfelt gift, or even a profitable item for your online craft shop.
When you dive into this Heart Keychain Crochet – Tutorial, you will quickly realize that the beauty of this project lies in its simplicity and versatility. Crocheting a small plush heart requires only a few basic stitches, a tiny bit of stuffing, and a standard keychain ring. Because it takes less than an hour to complete, it offers instant gratification for crafters who want to see their hard work come to life without committing to a massive, weeks-long project like a blanket or a sweater.
In this ultimate Heart Keychain Crochet – Tutorial, we are going to explore everything you need to succeed, from selecting the right materials to mastering the seamless assembly. We have optimized this guide to follow the best SEO practices while keeping the tone warm, human, and encouraging. Grab your crochet hook, choose your favorite yarn color, and let us get started on this wonderful creative journey together.
1. Choosing the Best Materials for Your Heart Keychain Crochet
Before you start working on your project, selecting the right yarn and hook combination is essential for achieving a clean, professional finish. For a durable, everyday item like a keychain, a high-quality cotton yarn or a sturdy acrylic blend is highly recommended. Cotton yarn gives excellent stitch definition, which makes your Heart Keychain Crochet – Tutorial project look crisp, while acrylic offers a softer, plush feel that holds its shape beautifully over time.
The weight of your yarn will directly determine the final size of your handmade heart. A medium worsted weight yarn (4-ply) is generally the easiest to work with for beginners and results in a perfectly sized keychain that fits comfortably in your hand. If you prefer a tiny, delicate heart, you can opt for a finer sport weight yarn or even embroidery floss, though these require a bit more patience and precision.
Choosing the correct crochet hook size is just as important as selecting your yarn. For amigurumi-style projects like this one, it is best to use a hook that is one or two sizes smaller than what the yarn label recommends. Using a smaller hook creates tight, dense stitches that prevent the polyester fiberfill stuffing from peeking through the gaps, ensuring a high-quality result.
In addition to your yarn and hook, you will need a few essential tools to complete your project. Make sure you have a sharp pair of scissors, a blunt tapestry needle for weaving in loose ends, and a handful of polyester fiberfill stuffing. You will also need a metal keychain ring, which you can easily attach to the top of your finished heart using a jump ring or a small strand of yarn.
Color selection is where you can truly let your personal creativity shine. While classic shades of red, pink, and burgundy are traditional favorites for a heart design, do not be afraid to experiment with modern pastels, vibrant neons, or even variegated yarns. Choosing unique color palettes can make your final piece stand out, especially if you plan to sell your creations at local craft fairs or on digital platforms.
Once you have gathered all your supplies, set up a comfortable, well-lit workspace where you can focus on your stitches. Having all your tools within arm’s reach makes the crafting process smooth, enjoyable, and relaxing. Now that your materials are ready, you are fully prepared to take the next step in this Heart Keychain Crochet – Tutorial and learn the fundamental stitches required.
2. Master the Basic Stitches and Techniques Required
To successfully complete this Heart Keychain Crochet – Tutorial, you only need to know a handful of fundamental crochet stitches. The entire project is built upon the magic ring, the single crochet, the half double crochet, and the double crochet. If you already know how to manage these basic techniques, you will find this pattern incredibly easy and fast to execute.
The foundation of any great amigurumi project is the magic ring technique, which allows you to start crocheting in the round without leaving a visible hole in the center. Pulling the yarn tail tight closes the gap completely, giving your heart a flawless, professional look right from the start. If you struggle with the magic ring, you can substitute it by chaining two and working your first round into the second chain from your hook.
As you work through the pattern, understanding how to increase and decrease your stitches is crucial for shaping the curves of the heart. A single crochet increase means placing two stitches into the exact same space, which expands the piece. Conversely, a single crochet decrease, specifically the invisible decrease, joins two stitches together seamlessly, which is vital for tapering the bottom point of your heart.
Maintaining a consistent yarn tension throughout your work is the secret to achieving a symmetrical and balanced shape. If your tension is too loose, the stuffing will show through and the heart might look misshapen; if it is too tight, your hands will tire quickly and inserting the hook will become difficult. Take your time during the first few rows to find a comfortable, steady rhythm.
Counting your stitches at the end of every single round is a habit that will save you a lot of time and frustration. It is very easy to accidentally skip a stitch or add an extra one, which can distort the symmetrical lobes of the heart. Using a simple locking stitch marker at the beginning of each round helps you keep track of your progress without losing count.
Mastering these basic skills not only ensures your success with this specific project but also builds your confidence for future crochet endeavors. Once you feel comfortable with your stitch consistency and understand how the shape is formed, you are ready to move on to the actual step-by-step assembly. Let us look at how to bring the two halves of your heart together.
3. Step-by-Step Assembly and Shaping the Perfect Heart
The unique shape of a crochet heart is achieved by creating two separate rounded domes, which are often referred to as the lobes, and then joining them together to form the body. To begin, you will crochet the first lobe according to the pattern instructions, fasten off the yarn, and set it aside. Then, you will crochet the second lobe, but this time, you will not cut the yarn when you finish.
To join the two pieces, you will insert your hook into any stitch of the first lobe and work a single crochet stitch directly across. This connecting stitch bridges the two separate pieces, merging them into one large circular round. From this point forward, you will be crocheting around the outside edge of both lobes combined, working downwards to create the classic V-shape of the heart.
As you progress down the body of the heart, you will begin a series of regular decrease rounds to taper the shape toward a sharp point. It is during these middle rounds that you should start adding your polyester fiberfill stuffing. Be sure to stuff the two top lobes firmly first, using the back of your crochet hook to push the stuffing gently into the corners so they look round and plump.
Do not overstuff the heart, as this can stretch the stitches apart and make the fabric look distorted. Add the stuffing gradually as you continue to decrease the stitch count in the final rounds. You want the keychain to be firm enough to retain its shape when squeezed, but still soft and pleasant to the touch when attached to a set of keys.
When you reach the final round, you will be left with a very small opening at the bottom point of the heart. Cut your yarn, leaving a long tail of about six inches, and pull it completely through the last loop. Thread this tail onto your tapestry needle and weave it through the front loops of the remaining stitches, pulling it tight like a drawstring to close the point seamlessly.
To finish the shaping, insert your needle through the very bottom point and push it out through the top center of the heart, pulling slightly to create an indentation between the two lobes. Knot the yarn securely, hide the remaining tail inside the body of the heart, and snip off any excess. Your gorgeous, three-dimensional plush heart is now beautifully formed and ready for the final hardware accessories.
4. Attaching Hardware and Customizing Your Finished Piece
Now that your plush heart is fully formed, it is time to transform it into a functional accessory by attaching the metal hardware. The most secure way to do this is by using a sturdy metal jump ring and a standard split keychain ring. Open the jump ring using a pair of small pliers, loop it directly through the top center stitches of the heart, slide the keychain ring on, and squeeze it firmly shut.
If you do not have metal jump rings on hand, you can easily create a durable yarn loop instead. Simply attach your yarn to the top center of the heart, chain about ten to fifteen stitches depending on your preferred length, loop it through your keychain ring, and slip stitch back into the starting point. Fasten off securely and weave in the ends to create a cohesive, fully handmade look.
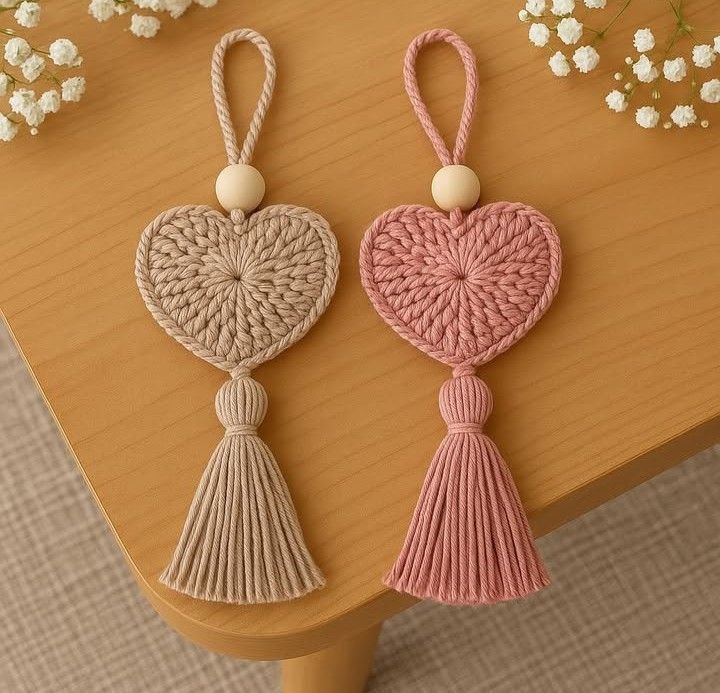
Customization is where you can truly elevate your Heart Keychain Crochet – Tutorial project and make it unique. Consider adding a small, elegant tassel made from the same yarn or a complementary color to hang alongside the heart. You can also slide colorful wooden beads or delicate faux-pearls onto the yarn loop before securing it to the metal ring for an extra touch of bohemian style.
Another wonderful way to personalize your crochet keychain is by embroidering simple details onto the surface of the fabric. Using black embroidery floss, you can stitch a pair of sleeping eyes and a tiny pink smile to give your heart a cute, Japanese kawaii-style personality. This simple addition makes the item incredibly appealing to children and young adults alike.
If you are making these keychains as gifts for a special occasion, such as Valentine’s Day, weddings, or Mother’s Day, consider adding a personalized touch. You can attach a small stamped metal tag with an initial, or tie a printed cardboard tag around the ring with a sweet message. These thoughtful details turn a simple, inexpensive craft into a deeply meaningful keepsake.
Finally, think about how you can package your finished items if you plan to sell them online or at local craft markets. Pinning the heart keychain to a beautifully designed backing card made from recycled kraft paper instantly elevates its perceived value. Professional presentation combined with high-quality stitching ensures your handmade creations will be loved and cherished by everyone who receives them.
Frequently Asked Questions
How long does it take to make one crochet heart keychain?
For most crafters, a single heart keychain takes between thirty to forty-five minutes to complete from start to finish. Once you memorize the basic pattern steps, you can easily turn this into a quick production project, allowing you to create multiple pieces while watching your favorite show or relaxing in the evening.
What is the best yarn to use for a durable keychain?
100% cotton yarn or a high-quality cotton-acrylic blend is the absolute best choice for items that are handled frequently. Cotton is incredibly durable, does not pill easily, and can be washed without losing its shape, making it ideal for a keychain that will spend time inside pockets and bags.
Can a complete beginner successfully finish this project?
Yes, absolutely! This project is highly recommended for beginners because it uses simple stitches like the single crochet and basic decreases. It is a fantastic way to practice working in the round and learning how to control stitch tension on a small, manageable scale.
How do I prevent the stuffing from falling out of the heart?
The secret to keeping the polyester fiberfill inside the heart is using a crochet hook that is smaller than what is recommended on your yarn label. This creates tight, compact stitches with minimal gaps, ensuring the stuffing stays safely contained inside even with daily use.
Can I wash my crochet heart keychain if it gets dirty?
Yes, you can wash it easily if you used cotton or acrylic yarn. It is best to hand wash the keychain in warm soapy water, rinse it thoroughly, and reshape it gently with your fingers before letting it air dry completely. Avoid machine washing to protect the metal hardware from rusting.
How many yards of yarn do I need for one keychain?
This is a fantastic stash-buster project because it requires less than fifteen to twenty yards of yarn per heart. You can easily create dozens of beautiful keychains out of a single standard skein of yarn, making it a very budget-friendly craft.
Conclusion
In this Heart Keychain Crochet – Tutorial, we have covered everything you need to know to create a gorgeous, handmade accessory from scratch. We explored the best materials to use, mastered the fundamental stitches, walked through the step-by-step assembly of the lobes, and discussed creative ways to attach hardware and personalize your finished piece.
This project is a wonderful example of how a small amount of yarn and a bit of creativity can turn into a beautiful, practical item that brings joy to your everyday life.