If you are a coffee lover or a tea enthusiast, learning how to make a Mug Cover with Fabric – Tutorial is the perfect weekend project for you. There is nothing quite like holding a warm cup of your favorite brew, but sometimes that mug gets just a little too hot to handle comfortably. That is exactly where a diy fabric mug cozy comes into play, offering a stylish, practical, and heat-resistant barrier for your hands.
This comprehensive Mug Cover with Fabric – Tutorial will guide you through the entire process of creating your very own customizable beverage sleeve. Not only do these little covers keep your drinks hot for longer periods, but they also prevent condensation from ruining your wooden tabletops. It is a fantastic way to use up those extra fabric scraps you have lying around your crafting room.
Whether you want to make a handmade mug sleeve for yourself or craft a thoughtful gift for a friend, this fabric coffee cuff guide is designed for crafters of all skill levels. By following this step-by-step approach, you will master the art of selecting materials, cutting patterns, assembling the pieces, and adding the perfect finishing touches. Let us dive into the wonderful world of fabric cup insulation and get crafting!
1. Choosing the Best Materials for Your Fabric Mug Cozy
When starting this Mug Cover with Fabric – Tutorial, selecting the right textiles is the most crucial step for ensuring longevity and safety. You want a material that can withstand high temperatures without melting, shifting, or losing its shape over time.
For the outer shell, 100% cotton fabric is highly recommended by crafting experts because it is durable, easy to wash, and comes in thousands of beautiful prints. Avoid synthetic blends like polyester for the inner layers, as they do not handle intense heat from a microwave or boiling water nearly as well.
To ensure proper fabric cup insulation, you will also need a high-quality batting or interfacing layer. Using a heat-resistant batting, such as Insul-Bright or a thick cotton batting, will shield your fingers from scorching mug surfaces effectively.
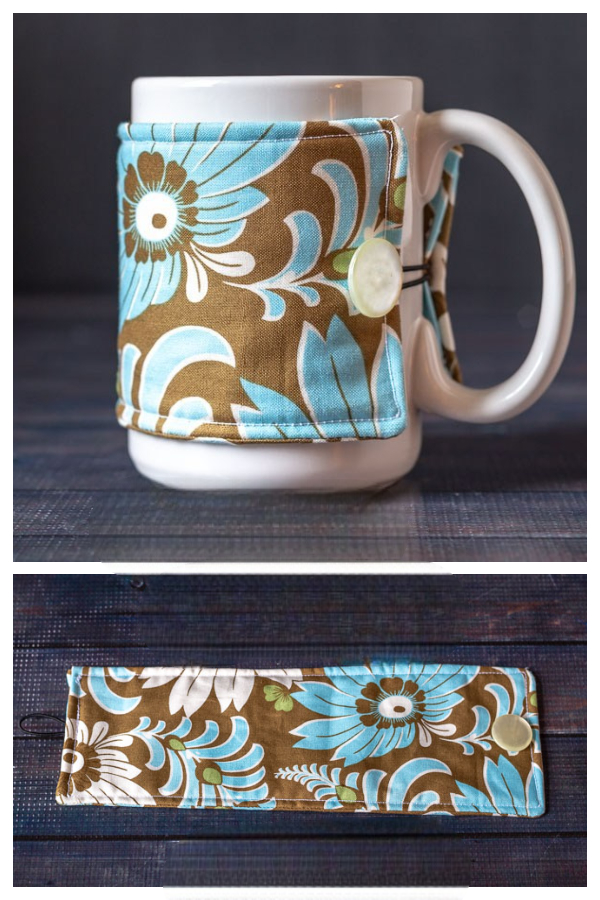
Aside from the textiles, you will need a reliable closure system to keep your handmade mug sleeve securely wrapped around your favorite cup. Elastic hair ties, hair bobs, or sturdy fabric loops paired with large vintage buttons are the most popular choices among DIY enthusiasts.
Do not forget your basic sewing notions before you begin cutting into your precious fabrics. Make sure you have a sharp pair of fabric shears, matching sewing thread, a water-soluble fabric marker, quilting pins, and a reliable iron for pressing.
Having all these materials ready beforehand ensures a smooth, uninterrupted crafting experience. Once you have gathered your cotton prints, insulated batting, and a beautiful button, you are fully prepared to move on to the next phase of our sewing tutorial.
2. Measuring and Cutting Your Custom Mug Sleeve Pattern
Mugs come in all shapes and sizes, which means a one-size-fits-all approach rarely works perfectly for a custom Mug Cover with Fabric – Tutorial. To get a sleek, tailored look, you should measure the specific mug you plan to use most frequently.
Take a flexible measuring tape and wrap it around the circumference of your cup, making sure to exclude the handle area. Write down this measurement, then add an extra inch to account for seam allowances and the thickness of your insulated batting.
Next, measure the height of the mug from the base up to about half an inch below the rim where your lips touch the glass. Subtracting that half-inch ensures you can comfortably sip your beverage without the diy fabric mug cozy getting wet.
Now it is time to transfer these dimensions onto a piece of cardstock to create your official reusable cup sleeve template. Draw a rectangle based on your adjusted measurements, creating a clean template that you can reuse for future sewing projects.
Place your paper template onto your chosen cotton fabric and cut out two identical pieces—one for the exterior design and one for the interior lining. Using a rotary cutter and a self-healing mat can help you achieve incredibly precise, straight lines here.
Finally, use the exact same template to cut one piece of your heat-resistant batting. If your fabric is particularly lightweight, you might also want to cut a piece of fusible interfacing to give your handmade mug sleeve more structure.
3. Step by Step Sewing Guide for Assembly
With all your pieces cut, you are officially ready for the assembly phase of our Mug Cover with Fabric – Tutorial. Start by placing your exterior fabric piece right side up on your workspace, as this will be the main face of your cozy.
Take your elastic loop or hair tie and pin it securely to one of the short edges of the fabric, pointing the loop inward. This elastic will eventually stretch across the mug handle to hook onto your button, holding the fabric coffee cuff in place.
Next, layer your lining fabric directly on top of the exterior piece, ensuring the right sides of both fabrics are facing each other. Place the layer of insulated batting directly on top of the lining piece, aligning all four edges perfectly.
Pin all three layers together securely using quilting pins or sewing clips so nothing shifts while you are operating your sewing machine. Leave a small two-inch opening on the bottom edge, which is essential for turning the project right side out later.
Sew around the perimeter of the rectangle using a standard quarter-inch seam allowance, making sure to backstitch over the elastic loop for extra reinforcement. Slow down around the corners to maintain a clean, professional shape for your diy fabric mug cozy.
Clip the excess fabric from the corners carefully, making sure you do not cut through your stitches. Reach inside the two-inch opening, gently pull the fabric through to turn it right side out, push the corners out with a chopstick, and press flat with an iron.
4. Adding Finishing Touches and Button Closures
The final stage of this Mug Cover with Fabric – Tutorial focuses on securing the opening and attaching the closure system. Look at the small two-inch gap you used to turn the fabric, tuck the raw edges inward neatly, and press them flat with your iron.
To create a crisp look and close the opening simultaneously, topstitch around the entire perimeter of your handmade mug sleeve. Sew approximately one-eighth of an inch away from the edge, which secures the gap and gives the piece a boutique-quality finish.
Wrap the newly sewn sleeve around your target mug to determine the exact placement for your button closure. Pull the elastic loop taut around the handle to see where it naturally rests on the opposite side of the fabric.
Mark that precise spot with your water-soluble fabric marker, as this is where your button needs to be securely attached. Thread a hand-sewing needle with doubled thread to ensure the button can withstand daily pulling and stretching.
Sew the button onto the marked spot, passing through all layers of the fabric cup insulation sleeve for maximum durability. Knot the thread securely on the backside, hide the tail under the button, and snip away any remaining loose threads.
Slide your brand-new, customized cozy onto your favorite coffee cup, loop the elastic over the button, and admire your hard work. You have successfully completed this sewing tutorial, creating a beautiful accessory that blends utility with personal style.
Frequently Asked Questions (FAQ)
Can I wash my fabric mug cover in the washing machine?
Yes, as long as you used 100% cotton fabric and quality batting, your mug cover is completely machine washable. It is best to wash it on a gentle cycle with cold water and lay it flat to dry so it retains its shape.
What is the best alternative if I do not have insulated batting?
If you do not have specialized heat-resistant batting, you can use multiple layers of 100% cotton flannel or a piece of an old cotton towel. Avoid synthetic fleece, as it can melt if it comes into contact with extreme heat.
Can I make this project entirely by hand without a sewing machine?
Absolutely! This project is small enough that it can easily be sewn by hand using a tight backstitch for the main seams and a running stitch for the topstitching. It just takes a little more patience.
How do I adjust this pattern for a travel travel mug or tumbler?
Travel mugs are often tapered, meaning they are wider at the top than the bottom. To adjust your pattern, wrap a piece of paper around the tumbler, trace the angled shape, and use that custom shape as your cutting template.
Is this fabric mug cozy safe to use in the microwave?
You should only put it in the microwave if you used 100% cotton fabric, 100% cotton thread, and 100% cotton batting. Never put a cozy in the microwave if it features metal buttons, metallic threads, or synthetic insulated batting like Insul-Bright.
Conclusion
In this Mug Cover with Fabric – Tutorial, you learned how to design, cut, assemble, and finish a beautiful, functional kitchen accessory.
We covered everything from choosing heat-safe cotton fabrics to measuring custom dimensions and executing clean topstitching.This project is a wonderful way to protect your hands, keep your drinks warm, and express your creative style.