How to Make Crochet Hair Bow Hair Accessories – Tutorial: creating your own stylish hair pieces is one of the most rewarding and creative DIY projects you can undertake. Whether you are a seasoned crocheter looking for a quick and satisfying weekend project or a complete beginner eager to learn a new skill, crafting crochet hair bow hair accessories offers an amazing blend of fashion and functionality. This step-by-step tutorial will guide you through the entire process, ensuring you can create beautiful, high-quality pieces that look professionally made.
Handmade items carry a unique charm that mass-produced accessories simply cannot replicate, which is why learning how to make crochet hair bow hair accessories is so popular today. These delightful items make perfect personalized gifts for friends and family, excellent stock for a small craft business, or just a wonderful addition to your own daily wardrobe. In this comprehensive guide, we will unpack everything from selecting the right materials to mastering the essential stitches required for this project.
By following this how to make crochet hair bow hair accessories – tutorial, you will discover that you do not need decades of experience to achieve stunning results. With just a basic understanding of stitches and a little bit of patience, you will soon be transforming simple skeins of yarn into fashionable hair bows and versatile hair accessories. Let’s dive straight into the world of creative yarn crafting and explore the wonderful art of making your very own crochet hair pieces.
1. Essential Materials and Tools for Your Crochet Project
Choosing the right supplies is the foundational step in learning how to make crochet hair bow hair accessories – tutorial style. The type of yarn you select will drastically influence the final look, texture, and durability of your hair accessories. For a crisp, clean appearance that holds its shape well, a 100% mercerized cotton yarn in a sport or lightweight weight is highly recommended.
Alongside your yarn, picking the correct hook size is crucial for maintaining the right tension. If your stitches are too loose, the crochet hair bow will droop; if they are too tight, the fabric becomes overly rigid. Generally, a 2.5mm to 3.5mm hook works beautifully with lightweight yarn to create a firm, sturdy structure.
You will also need a few basic notions that every crafter should have in their toolkit. A sharp pair of scissors and a tapestry needle are essential for cutting yarn and weaving in those loose ends cleanly. Having these tools nearby keeps your workspace organized and ensures your finished hair bow looks professional.
To transform your crochet piece into wearable hair accessories, you must select the right hardware bases. Metal alligator clips, snap clips, or elastic hair ties are the most popular choices for securing your work. Ensure that your hardware is sturdy and free of sharp edges that could potentially snag your delicate yarn.
Adhesives and securing tools also play a major role in the longevity of your handmade items. A high-quality hot glue gun or specialized fabric glue is necessary to firmly bond the crochet piece to the metal clip or elastic band. Alternatively, you can use extra yarn to sew the pieces together for an extra-secure, glue-free finish.
Lastly, consider adding embellishments to make your crochet hair bow hair accessories truly stand out from the crowd. Small faux pearls, wooden buttons, or subtle glitter threads can elevate a simple design into an elegant statement piece. Gathering all these materials beforehand ensures a smooth, uninterrupted, and highly enjoyable crafting experience.
2. Step-by-Step Guide to Crafting the Perfect Bow
To begin this how to make crochet hair bow hair accessories – tutorial practical phase, you will start by creating a slip knot and a foundation chain. The length of your chain determines the overall width of your finished hair bow. For a medium-sized bow, a foundation chain of roughly 25 to 30 chains is usually the perfect sweet spot.
Once your chain is ready, you will work in rows using basic stitches like the single crochet or half double crochet. Working back and forth creates a simple rectangle, which forms the main body of your crochet hair bow. Focus on keeping your tension consistent so that the edges of your rectangle remain perfectly straight.
After reaching your desired height—usually around 10 to 12 rows—it is time to fasten off your yarn. Cut the yarn, leaving a long tail of about 10 inches, which will be incredibly useful later on. Use your tapestry needle to weave in the starting tail, but keep the long tail free for shaping.
Now comes the magical part where your simple rectangle transforms into a beautiful classic bow shape. Pinch the exact center of your crochet rectangle vertically to create a neat accordion-style pleat. Hold this pinch firmly with your fingers while preparing to secure the shape with your remaining yarn tail.
Take that long yarn tail and wrap it tightly around the pinched center multiple times to lock the shape in place. Wrapping the yarn securely creates the classic middle knot appearance of traditional hair accessories. Once you are satisfied with the look, tie a secure knot at the back and weave in the remaining end.
To complete the structural part of this how to make crochet hair bow hair accessories – tutorial, you can optionally create a separate small band. Crochet a tiny strip of 3 stitches by 8 rows to wrap around the center instead of just using wrapped yarn. This advanced technique gives your handmade item a incredibly polished, high-end boutique appearance.
3. Assembling and Attaching Your Crochet Bow to Hair Hardware
With your beautiful bow fully formed, the next crucial step is attaching it securely to your chosen hardware. Whether you prefer alligator clips or elastic bands, the attachment method determines how comfortable and durable your hair accessories will be. A secure bond ensures the bow will withstand daily wear and tear without falling apart.
If you are using a metal alligator clip, it is highly recommended to line the top of the clip with ribbon first. Gluing a small piece of matching grosgrain ribbon to the metal provides a much better surface for the yarn to adhere to. This simple trick prevents the glue from peeling off the smooth metal surface over time.
Apply a precise line of hot glue along the top of your lined clip or hardware base. Carefully press the back center of your crochet hair bow onto the glue, holding it firmly for about 30 seconds. Be cautious not to use too much glue, as excess adhesive can seep through the stitches and ruin the front appearance.
For those who prefer a completely glue-free method, sewing the bow directly onto the hardware is a fantastic alternative. Use your tapestry needle and a strand of matching yarn to loop tightly through the holes of the clip or around the elastic band. Pull the stitches taut and knot them securely on the underside of the accessory.
If you are making crochet hair bow hair accessories for infants or toddlers, using soft nylon elastic headbands is the safest choice. These bands are extremely gentle on delicate heads and can be easily sewn onto the back of your crochet creation. Always check that there are no rough spots or exposed sharp edges before completing your piece.
Once your adhesive has fully cooled or your stitching is complete, give the bow a gentle tug to test its stability. This quality check ensures that your handmade item is safe, durable, and completely ready to be worn. Taking extra care during assembly guarantees a high-quality product that you can proudly display or gift.
4. Customization Tips and Advanced Variations for Crafters
Now that you know the basics of how to make crochet hair bow hair accessories – tutorial style, you can explore unlimited customization options. Changing your stitch patterns is one of the easiest ways to give your bows a completely fresh look. Experiment with textured stitches like the moss stitch, bobble stitch, or waffle stitch to add wonderful depth.
Playing with color combinations is another incredible way to elevate your unique crochet hair bow collection. You can create vibrant stripes by changing yarn colors every two rows, or use self-striping variegated yarn for an effortless multicolored effect. Ombre yarns also work beautifully to create a soft, elegant gradient across the accessory.
Adjusting the size of your project allows you to cater to different age groups and style preferences easily. By doubling your foundation chain and row count, you can create oversized statement pieces that are incredibly trendy. Conversely, minimizing the chain count results in adorable mini bows perfect for pigtails or delicate accent clips.
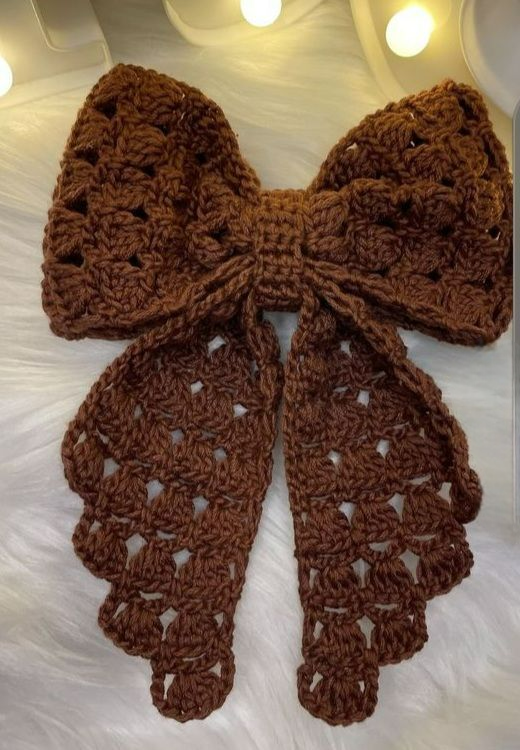
You can also add elegant tails to your bows to create a classic sailor bow style that looks sophisticated and timeless. To do this, crochet a separate, longer rectangle with angled ends and secure it behind the main bow before attaching the clip. This simple addition adds motion and a beautiful drape to your finished hair accessories.
Incorporating different material textures like metallic threads, velvet yarn, or bamboo blends can completely change the vibe of your project. Velvet yarn creates a luxurious, plush accessory perfect for autumn and winter holidays. Lightweight bamboo yarn, on the other hand, gives a breezy, delicate look ideal for spring and summer styles.
Do not be afraid to think outside the box and combine your crochet skills with other traditional crafting methods. Adding delicate embroidery flowers on top of your finished bow or sewing tiny seed beads along the edges creates a stunning mixed-media masterpiece. Innovation and personal expression are what make handmade crafting an endlessly fulfilling journey.
FAQ – Frequently Asked Questions
What is the best type of yarn for making crochet hair bows?
The absolute best yarn for creating crochet hair bow hair accessories is 100% mercerized cotton yarn. Cotton provides excellent stitch definition, holds its shape beautifully over time, and is less prone to fuzzing or pilling compared to acrylic. Lightweight options like sport weight (Category 2) or DK weight (Category 3) yarn yield the cleanest, most professional-looking results.
How do I stop my crochet hair bow from drooping or losing its shape?
If your finished piece feels too floppy, your crochet tension might be a bit too loose, or your yarn choice might be too heavy. Try dropping down a half or full millimeter in hook size to create tighter, denser stitches that naturally hold their form. Alternatively, you can apply a fabric stiffener spray or a light mix of water and school glue to the back of the bow to add extra rigidity.
Can beginners complete this crochet hair bow tutorial easily?
Yes, this project is exceptionally beginner-friendly because it relies primarily on basic crochet foundations. If you know how to make a slip knot, chain, and work a single crochet stitch, you can easily complete this tutorial. It is an excellent confidence-building project for newcomers because it is quick to finish and uses very little yarn.
How do I safely clean handmade crochet hair accessories?
Because these items are attached to metal hardware or delicate elastics, hand washing is highly recommended. Submerge the fabric part gently in cool water mixed with a drop of mild soap, avoiding soaking the metal clip to prevent rust. Rinse thoroughly, gently press out excess water with a clean towel, reshape the bow with your fingers, and lay it flat to air dry completely.
What size crochet hook should I use for small hair bows?
For smaller, more delicate hair accessories, a smaller hook ranging from 2.0mm to 2.75mm is ideal. Pairing a smaller hook with a fine fingering weight or size 10 crochet thread allows you to create tiny, intricate designs. Always check your yarn label’s recommended hook size and go down one size to ensure your stitches are tight enough for accessory work.
Conclusion
Mastering how to make crochet hair bow hair accessories – tutorial style opens up a wonderful world of creative, budget-friendly crafting possibilities.
Throughout this guide, you have learned how to select the ideal cotton yarns, construct a clean rectangular base, shape it into a classic bow, and securely attach it to various types of functional hair hardware. This project proves that with basic stitches and consistent tension, anyone can create boutique-quality items at home.