Fabric chair covers are a fantastic, budget-friendly way to instantly elevate your home decor or protect your furniture from daily wear and tear. Whether you want to breathe new life into a worn-out dining room set, dress up a special event, or simply give your living space a fresh seasonal update, mastering this DIY project is a game-changer. This comprehensive fabric chair covers – tutorial is designed to guide you through every single step of the process, ensuring a professional, beautiful result even if you are a complete beginner at sewing.
Transforming your seating with custom slipcovers allows you to unleash your creativity while choosing exact colors, textures, and patterns that match your personal style perfectly. Instead of spending a fortune on brand-new furniture, you can use high-quality textiles to achieve a high-end look on a budget. In this guide, we will break down the entire process from measuring to final stitches so you can tackle this project with absolute confidence.
Learning how to craft custom linens for your seating is a highly rewarding skill that combines functionality with interior design. By following our detailed fabric chair covers – tutorial, you will discover the best techniques for selecting textiles, cutting patterns, and achieving a snug, tailored fit. Let’s dive into the essential materials, steps, and expert secrets needed to create stunning, durable results for your home.
1. Choosing the Right Textiles for Your Slipcover Project
Selecting the perfect material is the foundational step of any successful fabric chair covers – tutorial because the weight and drape of the textile determine the final look. For everyday use, you want a sturdy, machine-washable option like cotton duck, canvas, or linen blends that can withstand frequent washing. These tightly woven materials provide excellent coverage, ensuring that the original color or pattern of the seat does not bleed through your new creation.
If you are designing projects for special events like weddings or elegant dinner parties, lighter options like satin, velvet, or polyester blends might fit your aesthetic better. However, keep in mind that stretchier or slicker materials require a bit more patience and pins during the construction phase to prevent slipping. Always consider the primary function of the seating before making your final purchase at the textile store.
Pre-washing your chosen material is a non-negotiable step that many beginners overlook, often resulting in a ruined piece after the first laundry cycle. Because natural fibers shrink significantly when exposed to water and heat, washing and drying your material beforehand ensures your final piece maintains its perfect fit. Ironing the material right after drying will also make the measuring and cutting processes infinitely easier and more precise.
When calculating the total yardage needed, it is always wise to buy a little extra material to account for pattern matching, seam allowances, and accidental mistakes. If your chosen textile features a large repeating pattern or distinct stripes, you will need extra length to align the design beautifully across the seat and backrest. A good rule of thumb is to add at least one extra yard to your total estimate just to be completely safe.
The color and texture you choose should complement the existing color palette of your room while reflecting your personal style. Neutral tones offer incredible versatility, allowing you to accessorize with vibrant pillows or seasonal table settings throughout the year. On the other hand, bold geometric prints or deep jewel tones can turn a simple dining set into the ultimate focal point of the space.
Investing in a high-quality thread that matches the weight and color of your material is equally important for longevity. A strong polyester thread is generally recommended for home decor projects because it offers excellent durability and slight flexibility under pressure. Once your workspace is clean, your materials are prepped, and your tools are ready, you can move directly to the drafting phase.
2. Essential Tools and Detailed Measuring Guide
Accurate measurements are the true secret to a beautifully fitted slipcover that looks professional rather than sloppy and loose. To begin this part of our fabric chair covers – tutorial, you will need a flexible measuring tape, a notebook, a fabric marker, and plenty of straight pins. Take your time during this phase, measuring each section of the structure at least twice to ensure complete accuracy before making any cuts.
Start by measuring the highest point of the backrest straight down to the seat cushion, and then from the top of the backrest down to the floor or desired hemline. Next, measure the width of the backrest at its widest point, keeping in mind that some structures taper slightly toward the bottom. Document each dimension clearly in your notebook, labeling them carefully to avoid confusion later when you are handling the layout.
Move on to the seat cushion, measuring its total width at the front, its width at the back, and the total depth from the front edge to the backrest. You must also measure the thickness or height of the cushion, as this depth determines how much material is needed for the side bands. If your design includes a skirt, measure from the seat edge down to the floor, subtracting about an inch so the hem doesn’t drag.
To convert these raw measurements into a workable pattern, you must add a standard seam allowance of one inch to every single side of your dimensions. This extra space gives you a comfortable half-inch seam allowance on both sides, allowing room for adjustments and ensuring the cover isn’t too tight to slip on. It is always much safer to draft a slightly larger piece, as taking in a seam is easy, but adding material is impossible.
If your seating has an unusual shape or curved edges, creating a paper template using inexpensive muslin or wrapping paper is a highly recommended strategy. Draping the paper directly over the structure allows you to trace the exact contours and mark dart placements accurately before cutting your expensive material. This draping method minimizes guesswork and guarantees a customized fit tailored precisely to your specific furniture piece.
Finally, ensure your sewing machine is equipped with the correct needle size for the weight of your chosen material. A heavy-duty denim or canvas needle is essential for thick textiles, preventing skipped stitches or broken needles when sewing through multiple layers of material. Gather your sharpest dressmaking shears, clear off a large cutting table, and prepare to transition your written dimensions onto your prepared textile.
3. Step-by-Step Cutting and Sewing Instructions
With your dimensions fully prepped, lay your pressed material completely flat on your work surface, paying close attention to the grainline of the textile. Transfer your calculated pattern pieces onto the wrong side of the material using your erasable fabric marker or traditional tailor’s chalk. Carefully cut out the main pieces: the front backrest, the back backrest, the seat cushion top, and any necessary side or skirt panels.
The actual assembly phase of our fabric chair covers – tutorial begins by joining the front backrest piece to the back backrest piece. Pin the two sections together with right sides facing, matching the top and side edges perfectly to ensure symmetry. Sew along the top and side edges using your designated seam allowance, leaving the bottom edge completely open where it will eventually meet the seat.
Next, it is time to attach the completed backrest section to the main seat cushion piece, which requires careful pinning around the rear corners. Pin the bottom edge of the front backrest to the back edge of the seat piece, keeping right sides together. Sew this crucial seam carefully, reinforcing the start and finish with a reliable backstitch to prevent the threads from unraveling under daily seating pressure.
If your design features side boxing strips or a drop-down skirt, pin these panels around the remaining three sides of the seat cushion piece. Take extra care around the front corners, snipping a small notch into the seam allowance of the strip to help it turn the corner smoothly without bunching. Sew these panels in place, removing the straight pins as you approach them to avoid breaking your sewing machine needle.
Once the primary structure is fully assembled, carefully press all your internal seams open using a warm iron to create crisp, flat edges. Slide the unfinished slipcover over your furniture piece for a quick fitting session to check the accuracy of your seams and overall drape. Use your straight pins to mark any areas that feel too loose or bunch uncomfortably, adjusting the pins until the fit looks smooth and tailored.
After making any necessary adjustments at the machine, finish the raw edges of your internal seams with a zigzag stitch or a serger to prevent fraying. To complete the project, fold the bottom hem under by half an inch, press it flat, fold it another half-inch, and topstitch it neatly. Remove any remaining basting threads, give the entire piece a final professional steam press, and proudly slide it onto your furniture.
4. Maintenance Tips and Creative Design Variations
Now that you have completed this comprehensive fabric chair covers – tutorial, proper maintenance will ensure your gorgeous creations stay pristine for years. Always check the washing instructions for your specific textile type, opting for cold water and gentle cycles to preserve the vibrant colors. Air drying your slipcovers or using a low heat setting prevents unwanted shrinkage, maintaining that perfectly tailored fit you worked so hard to achieve.
To make your custom linens even more practical for busy households with kids or pets, consider applying a stain-resistant fabric protectant spray. These clear sprays create an invisible barrier that repels liquid spills, allowing you to quickly blot away messes before they stain the fibers. Regularly vacuuming the slipcovers with an upholstery attachment removes dust, pet hair, and crumbs that accumulate in the crevices over time.
For those who want to experiment with style, adding creative design variations can instantly elevate a simple pattern into a custom statement piece. Incorporating contrasting piping or welt cords into the seams defines the structural shape of the furniture beautifully, giving it an upscale appearance. You can make your own piping using matching or contrasting material wrapped around a standard cotton upholstery cord.
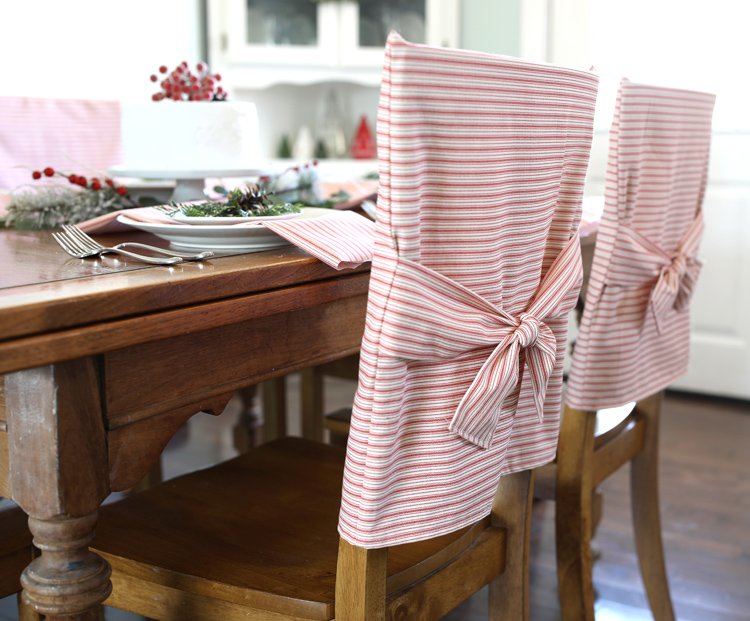
Another gorgeous styling option is incorporating elegant fabric ties, bows, or hidden zippers at the back of the slipcover for added visual interest. Long ties made from the same material or complementary satin ribbons can be tied into beautiful bows around the rear legs, adding a touch of rustic charm. Zippers or hook-and-loop fasteners offer a sleeker, modern aesthetic while making the removal process incredibly quick and effortless.
If you enjoy a more relaxed or romantic farmhouse aesthetic, consider adding a gathered or pleated skirt to the bottom of your seat panel. A pleated skirt adds sophisticated architectural lines, while a softly gathered ruffle lends a cozy, vintage feel to a dining room or kitchen. The creative design options are truly limitless once you understand the basic structural steps outlined in this guide.
Do not be afraid to mix and match different textures and colors across your seating arrangement for a curated, modern look. For example, you can use a bold patterned textile for the two captain’s chairs at the ends of a dining table while keeping the side chairs in a coordinating solid color. This design trick creates an inviting, professionally styled dining space that reflects your unique personality and crafting skills.
Frequently Asked Questions (FAQ)
What is the best type of material to use for everyday dining chair slipcovers?
For daily use, the most reliable choices are medium to heavy-weight textiles such as cotton duck, cotton canvas, denim, and linen-cotton blends. These options are highly durable, easy to clean in a standard washing machine, and thick enough to hide the existing upholstery underneath completely.
Can I make a custom slipcover without using a sewing machine?
While a sewing machine provides the most durable and professional results, you can create temporary or no-sew versions using high-quality fusible hem tape and an iron. However, keep in mind that no-sew methods may not hold up as well to frequent machine washing or heavy daily use.
How much extra material should I buy for pattern matching?
If your chosen textile features a large print, stripes, or plaids, it is highly recommended to buy an additional 15% to 20% more material. This extra length allows you to align the design motifs perfectly across the backrest and seat for a seamless, professional appearance.
Why does my finished slipcover look bunchy or loose around the corners?
Bunching usually occurs when the seam allowances around sharp corners aren’t clipped properly before turning the project right-side out. Cutting small v-shaped notches into the curve of the seam allowance releases the tension of the material, allowing the corners to lay completely flat and crisp.
Conclusion
In this comprehensive fabric chair covers – tutorial, we have covered every essential stage of creating beautiful, custom slipcovers for your home furniture.
From selecting the most durable, machine-washable textiles to taking precise measurements, cutting accurately, and mastering the assembly process, you now have the knowledge to transform your seating.Remember that patience during the measuring and pinning phases is the ultimate key to achieving that highly coveted, professional tailored fit.