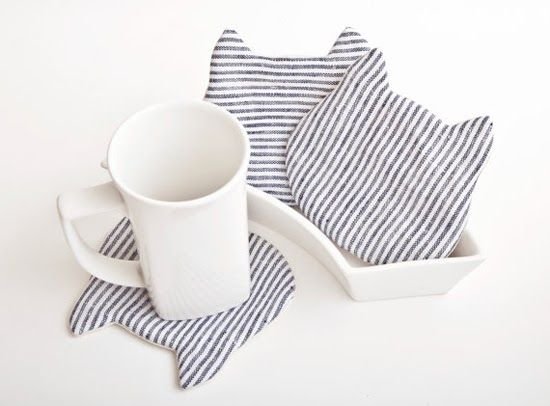
Kitten-shaped coasters- Tutorial are the perfect weekend project for craft enthusiasts who want to blend functionality with absolute cuteness. If you have been looking for a fun, engaging, and practical way to use up your yarn stash, this comprehensive guide will walk you through every single step of the process. Coasters are essential for protecting your wooden surfaces from unsightly water rings, but there is absolutely no reason they have to be boring or plain. By adding a whimsical feline twist, you can transform a standard household item into a delightful conversation starter that brings joy to your morning coffee routine.
Creating these adorable handmade items allows you to express your creativity while mastering basic stitches that form the foundation of more complex fiber arts. Whether you plan to keep a set for your own living room coffee table or package them up nicely as a thoughtful, heartfelt gift for a cat-loving friend, the process itself is incredibly therapeutic and rewarding. This detailed kitten-shaped coasters- tutorial is designed to ensure success, offering clear directions that cater to various skill levels while keeping the energy light, fun, and deeply encouraging throughout the making process.
In the world of modern fiber arts, finding projects that are both quick to complete and visually stunning can be a challenge, which is why this specific design has captured the hearts of so many makers globally. You do not need an extensive workshop or expensive machinery to get started; all it takes is a hook, some cotton yarn, a little bit of patience, and your love for handmade decor. Let us dive deep into the materials, techniques, and secret tips required to bring these charming little feline friends to life right at your fingertips.
1. Essential Materials and Tools for Your Project
Before pulling up a chair and tensioning your yarn, gathering the correct supplies is the most critical step to ensure your kitten-shaped coasters- tutorial yields the best possible results. The absolute best choice for any functional mug rug is 100% cotton yarn because of its superior durability, heat resistance, and incredible liquid absorption capabilities. Acrylic yarn might melt under a boiling hot mug of tea, and wool can felt or shrink when washed, making cotton the undisputed champion for tabletop accessories.
In terms of yarn weight, a standard medium worsted weight (category 4) is highly recommended for beginners because it offers excellent stitch definition and works up quickly without being too bulky. You will also need a matching crochet hook, typically ranging between 3.5mm and 4.5mm, depending entirely on your personal tension styles. If you tend to stitch very tightly, opt for the larger hook size, whereas loose stitchers should choose the smaller option to keep the fabric dense.
Beyond the yarn and hook, a few basic notions will make your crafting experience much smoother and more enjoyable from start to finish. A sharp pair of craft scissors is essential for clean cuts, and a blunt-tipped tapestry needle is absolutely required for weaving in those loose ends securely. You will also find that a few locking stitch markers are incredibly helpful for tracking the beginning of your rounds, especially when working in a continuous spiral format.
For the final decorative details that give your project its unique personality, consider keeping some embroidery floss on hand in contrasting colors like black, pink, or white. This floss will be used to stitch the delicate nose, whiskers, and closed sleeping eyes onto the face of your cat coaster. Alternatively, some crafters prefer using small safety eyes, though embroidery remains the safest option if these items will ever be around toddlers or pets.
Setting up a comfortable, well-lit workspace is just as important as the physical tools you select for the job. Ensure you have a comfortable chair with good back support and a bright desk lamp or natural window light so you do not strain your eyes while looking at dark yarn colors. Having a small tray or basket to hold all your loose materials keeps everything organized and prevents your yarn balls from rolling across the living room floor.
Ultimately, investing a few minutes to organize your materials beforehand guarantees an uninterrupted, peaceful crafting session where you can focus entirely on your stitches. Once you have your cotton yarn, hooks, needles, and scissors neatly laid out on your workspace, you are completely prepared to begin. Let us move forward into the foundational steps of constructing the main body structure of your beautiful handmade creation.
2. Step-by-Step Guide to Crafting the Coaster Body
The foundation of our kitten-shaped coasters- tutorial begins with creating a perfectly flat, sturdy circular base that mimics the chubby face of a happy cat. To kick things off, you will want to form a magic ring, which is the ultimate technique for ensuring the center of your coaster has zero gaps or holes. Inside this magic loop, you will chain two and work twelve double crochet stitches, then pull the yarn tail tightly to close up the central opening completely.
For the second round of your circular base, the primary goal is to double the number of stitches smoothly without causing the edges of the circle to ripple or curl upward. You will achieve this by working two double crochet stitches into every single stitch from the previous round, ending with a total of twenty-four stitches. Remember to slip stitch to the very first stitch of the round to join your work cleanly and maintain an even circle.
Moving into the third round, we establish a consistent growth pattern by alternating between single increases and individual stitches across the entire perimeter. The exact rhythm for this round is to place one double crochet in the first stitch, followed by two double crosses in the next stitch, repeating this sequence all the way around. This systematic increase brings your final count to thirty-six stitches, expanding the diameter to the perfect size for standard coffee mugs.
If you prefer a slightly larger surface area to accommodate oversized soup mugs or wide mason jars, you can easily add a fourth round to your base. For this optional expansion, the increase pattern changes slightly to placing one double crochet in the next two stitches, followed by an increase in the third stitch. This keeps the circle completely flat, laying the ideal foundation for the whimsical feline features we are about to add.
Consistency in your tension during these initial rounds is paramount to ensuring your completed item sits perfectly flat on hard, flat surfaces. If you notice your edges lifting like a small bowl, your stitches are likely a bit too tight, and you should consider switching to a slightly larger hook size. On the other hand, if the fabric looks wavy, your stitches are too loose, meaning a smaller hook will fix the issue.
Once your circular base reaches the desired diameter, do not fasten off your yarn just yet, as we will use the working loop to transition directly into the ears. Take a moment to admire the clean, neat circles you have created, ensuring your stitch counts are completely accurate before proceeding. Accurate counting at this stage guarantees that the ears will be perfectly symmetrical and balanced on the top of the head.
3. Shaping the Adorable Cat Ears and Tail
Now comes the most magical part of our kitten-shaped coasters- tutorial, where a simple circle transitions beautifully into an easily recognizable, adorable feline shape. Without cutting your yarn from the base circle, you will slip stitch into the next two stitches to position yourself perfectly for the first ear structure. In the very next stitch, you will work a sequence of a half double crochet, a double crochet, a treble crochet, and a chain-one peak.
To complete this first triangular ear and bring it back down to the edge of the circle, work another treble, double, and half double crochet all into that same base stitch. This concentrated cluster of varying stitch heights creates a beautifully pointed, sturdy triangle that stands up proudly without flopping over. Slip stitch into the next six stitches across the top of the head to create the flat space between the ears.
Once you have traversed that short distance, it is time to replicate the exact same stitch sequence in the next loop to create the second ear. Work your half double, double, treble, chain-one, treble, double, and half double crochet all into that single stitch, ensuring your tension matches the first ear perfectly. Slip stitch into the next stitch to secure the ear down, and suddenly your plain circle has transformed into a cat.
For those who want to add an extra layer of charm, creating a whimsical curved tail along the bottom edge of your coaster is a fantastic design choice. To do this, continue slip stitching around the side of the body until you reach the exact opposite side of the head structure. Chain twelve loosely from the edge, then work two single crochets into each chain stitch back down toward the body, creating a natural, playful curl.
When you reach the base of the body again, attach the tail securely with a firm slip stitch, cut your yarn leaving a six-inch tail, and pull it through. This clever method of building the ears and tail directly onto the main body minimizes the amount of separate pieces you have to sew on later. It creates a seamless, durable design that can withstand daily use and frequent trips through the washing machine without coming apart.
Take a step back to examine the symmetry of your ears and the playful curve of the tail to ensure you are happy with the proportions. If anything looks slightly off-center, it is incredibly easy to back up a few stitches and adjust the placement to achieve visual perfection. With the main shaping completely finished, you are now ready to move on to the creative artistry of facial embroidery.
4. Final Details, Embroidery, and Blocking Tips
The true personality of your handmade piece shines brightest during the finishing stages of this kitten-shaped coasters- tutorial, where basic embroidery brings the face to life. Thread your tapestry needle with a strand of pink embroidery floss to stitch a small, upside-down triangle right in the center of the face for the nose. Keep your stitches close together and moderately loose so they sit softly on top of the crochet fabric without distorting it.
Next, switch over to a strand of black or dark grey floss to add two simple, downward-curved lines on either side of the nose to mimic sleeping eyes. This closed-eye expression gives the kitten a serene, cozy, and peaceful look that perfectly complements a relaxing morning cup of coffee or evening tea. From the outer edges of the face, stitch two or three straight horizontal lines on each side to form delicate little whiskers.
Once the embroidery is complete, flip your work over to the backside to securely weave in all your loose yarn tails using your trusty tapestry needle. Pass the yarn needle horizontally through the dense base stitches, reversing directions at least three times to lock the threads firmly into place. Cutting the yarn flush with the fabric ensures no unsightly loose threads will peek through or unravel over extended periods of heavy use.
Because crochet items worked in the round can sometimes cup or lose their perfect shape during construction, a process called blocking is highly recommended. Wet blocking involves submerging your completed coasters in lukewarm water mixed with a drop of gentle wool wash, then squeezing out the excess moisture in a towel. Lay them completely flat on a foam blocking mat, pinning the edges, ears, and tail into their absolute perfect geometric positions.
Allow the pinned items to air dry completely for twenty-four hours away from direct heat sources or curious house pets who might mistake them for toys. This simple blocking step relaxes the cotton fibers, sets the stitches permanently, ensures the item lays perfectly flat on your tables, and delivers a professional finish. Your gorgeous, customized tabletop protector is now fully completed and entirely ready to protect your home surfaces in style.
If you are feeling extra adventurous, you can make an entire set of four or six pieces using a beautiful palette of complementary pastel or neutral tones. Mixing colors like cream, soft grey, ginger, and charcoal allows you to create a diverse litter of kittens that brightens up any room decor. Now that you have mastered the complete creation process, let us address some of the most common questions crafters ask when diving into this project.
Frequently Asked Questions (FAQ)
What is the absolute best yarn type to use for this specific coaster project?
The most highly recommended yarn for making coasters is 100% cotton yarn in a worsted or sport weight. Cotton is highly absorbent, incredibly easy to clean, and handles heat from hot beverage mugs exceptionally well without melting, unlike synthetic fibers such as acrylic.
How do I prevent my crochet coasters from curling up at the edges?
Curling is usually caused by tight tension or incorrect stitch counts during the initial increase rounds of the base circle. To fix this, try consciously relaxing your hands while working, switching to a slightly larger hook size, or double-checking that you are increasing accurately in every round.
Can these handmade items be washed safely in a standard washing machine?
Yes, if you used 100% cotton yarn and wove your ends in securely, they can be machine washed on a gentle, cool cycle. To maintain their beautiful shape and prevent shrinking, it is always best to reshape them by hand and lay them completely flat to air dry.
Is this specific pattern suitable for someone who is an absolute beginner?
This project is incredibly beginner-friendly because it relies on foundational crochet stitches like single, double, and treble crochet. The small size of the project means it can be completed quickly, giving beginners a fast sense of accomplishment while practicing stitch variations.
How can I make the face look perfectly symmetrical every single time?
The secret to perfect facial symmetry is using your crochet stitches as a natural grid guide for your embroidery work. Count the stitches out from the exact center point of the magic ring to ensure your eyes, nose, and whiskers are perfectly aligned on both sides.
Conclusion
In this comprehensive kitten-shaped coasters- tutorial, we have covered everything from selecting the ideal absorbent cotton yarn to mastering the magic ring, shaping whimsical ears, and adding delicate embroidered expressions.
Crafting these charming tabletop accessories is a wonderful way to practice your tension, explore stitch heights, and create practical pieces of home decor that combine utility with artistic expression.