Macrame Owl – Tutorial projects have taken the crafting world by storm, blending vintage bohemian charm with a whimsical touch that fits perfectly into modern home decor. If you are looking to create a piece of wall art that is both impressive and deeply satisfying to make, this Macrame Owl – Tutorial will guide you through every single step of the process. This specific design is a favorite among fiber artists because it allows for a beautiful display of texture and symmetry while remaining accessible to those who are still mastering their cord management skills.
Embora many people feel intimidated by the intricate look of these feathered friends, the truth is that a Macrame Owl – Tutorial relies on just a few foundational knots that, once repeated, create a stunningly complex appearance. In this guide, we will explore how to select the right materials, master the essential macrame knots, and assemble a wise little owl that can hang in a nursery, a living room, or even serve as a unique handmade gift. We focus on a humanized approach to crafting, acknowledging that every artisan has a different rhythm and that mistakes are simply part of the creative journey.
The beauty of following a detailed Macrame Owl – Tutorial is the versatility it offers in terms of personalization and sustainable design. You can choose to use natural cotton cord, recycled fibers, or even add a splash of color with hand-dyed yarns to make your owl stand out. By the end of this comprehensive article, you will not only have a finished Macrame Owl – Tutorial project but also a deeper understanding of how to structure fiber art for maximum visual impact and durability. Let’s dive into the supplies and techniques needed to bring this project to life.
1. Essential Materials for Your Macrame Owl – Tutorial
To begin your Macrame Owl – Tutorial, you must first gather high-quality cotton macrame cord. Most enthusiasts prefer a 3mm or 4mm 3-strand twist cord because it provides excellent structure for the owl’s “feathers” and body. A sturdy cord ensures that your wall hanging maintains its shape over time without sagging under its own weight.
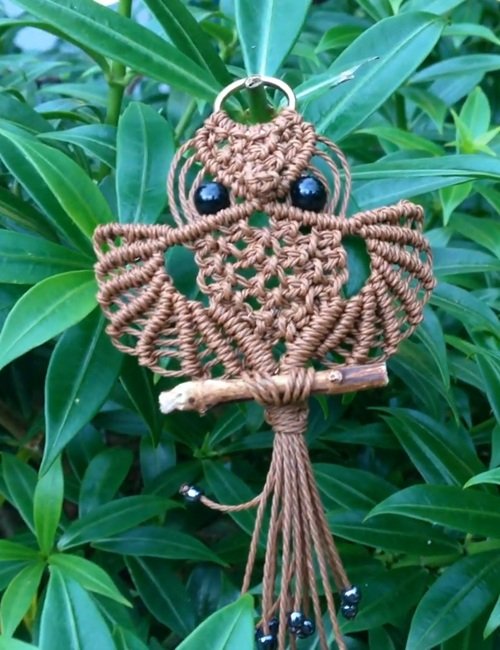
Next, you will need a wooden dowel or a natural driftwood branch to serve as the perch for your owl. Using a natural branch adds an authentic, rustic feel to the Macrame Owl – Tutorial, making each piece truly one-of-a-kind. Ensure the wood is sanded smooth to prevent the fibers from snagging while you work on your knotting patterns.
Eyes are the most defining feature of any Macrame Owl – Tutorial, and for this, we recommend large wooden beads. Choose beads with a wide enough hole to thread your cord through comfortably. Darker wood tones like walnut or mahogany often provide a striking contrast against cream cotton cord, giving your owl an alert and soulful expression.
Sharp craft scissors and a measuring tape are non-negotiable tools for a successful Macrame Owl – Tutorial. Precision in cutting your cord lengths is vital for maintaining symmetry throughout the project. You might also want to keep a fine-tooth comb nearby to brush out the fringe at the bottom, creating a soft, feathered effect for the owl’s tail.
A flat workspace or a macrame board with T-pins will make the Macrame Owl – Tutorial much easier to manage. Keeping your work stationary allows you to maintain consistent tension in your knots, which is the secret to a professional-looking finish. If you don’t have a board, hanging your dowel at eye level using S-hooks is a great alternative.
Finally, consider the aesthetic environment where your owl will live. If you are making this as a DIY home decor piece, think about adding small accents like copper rings or colored spacers. Having all these macrame supplies ready before you start will prevent interruptions and keep your creative energy flowing smoothly.
2. Mastering the Basic Knots for the Owl Design
The foundation of any high-quality Macrame Owl – Tutorial is the Lark’s Head Knot, which is used to attach your cords to the dowel. This knot is simple but must be pulled tight to ensure the weight of the owl is distributed evenly. In this Macrame Owl – Tutorial, we typically start with a specific number of cords to create the width of the head.
The Square Knot is the powerhouse of the Macrame Owl – Tutorial, forming the bulk of the owl’s forehead and body. By alternating these knots, you create a “mesh” that looks like a solid fabric. It is important to practice your square knot technique to ensure that each “loop” is the same size, giving your owl a neat and tidy appearance.
To create the iconic curved shape of the owl’s wings, we use the Double Half Hitch Knot. This knot allows you to “draw” lines with the cord, creating diagonal ridges that mimic the look of folded wings. In our Macrame Owl – Tutorial, mastering the diagonal half hitch is what separates a beginner project from an advanced piece of textile art.
For the eyes, this Macrame Owl – Tutorial utilizes the Berry Knot or a series of wrapped knots around the wooden beads. This adds three-dimensional volume to the face, making the eyes pop. Understanding spatial awareness in macrame is key here, as you want the eyes to be level and centered within the head’s frame.
As we progress through the Macrame Owl – Tutorial, you will encounter the Spiral Stitch (or Half Square Knot). This is often used for the hanging loop or decorative side elements. The natural twist of this stitch adds a dynamic, fluid movement to the boho wall hanging, contrasting well with the geometric body of the owl.
Consistency is the most important factor when executing these macrame techniques. If you pull one knot tighter than the others, the owl might look lopsided. This Macrame Owl – Tutorial encourages you to step back frequently and check the alignment of your knotted rows to ensure everything is progressing symmetrically.
3. Step-by-Step Body Construction and Wing Detailing
In this stage of the Macrame Owl – Tutorial, we move from the head down to the chest, where the “plumage” is created. Using a series of alternating square knots, we build a V-shape that resembles the owl’s chest. This SEO-friendly tutorial emphasizes the importance of leaving some cords loose to represent the softness of a real owl’s down feathers.
The wings are the most technical part of the Macrame Owl – Tutorial. By using the Double Half Hitch in a tiered fashion, you can create layers of texture. Many artists like to add fringe detailing along the edges of the wings, which can be brushed out later to give the piece a more organic, “alive” feel.
As the Macrame Owl – Tutorial moves toward the belly, we often incorporate a Diamond Pattern. This is achieved by manipulating the direction of your filler cords. This geometric center acts as a focal point, drawing the eye toward the center of the macrame piece and highlighting the intricacy of your handiwork.
Don’t forget the beak! In a Macrame Owl – Tutorial, the beak is usually a small, tight square knot or a specialized braided knot placed directly between the eyes. It should be small enough not to overwhelm the face but distinct enough to give the owl its predatory yet charming character.
The “feet” of the owl in this Macrame Owl – Tutorial are often represented by wrapping the cord around a second, smaller dowel or simply by grouping the cords into two bunches. Some creators like to add talon accents using smaller beads or specific binding knots to emphasize the owl’s grip on its perch.
The final part of the body construction in our Macrame Owl – Tutorial involves the tail. Here, you have the creative freedom to leave the cords long and straight for a sleek look or to cut them into a pointed V-shape. Adding tassels or extra fringing can provide that classic bohemian style that is so popular in modern interior design.
4. Finishing Touches and Displaying Your Fiber Art
Once the knotting of your Macrame Owl – Tutorial is complete, the finishing work begins. This is where you use your sharp scissors to trim any excess cord. Always trim less than you think you need first; you can always cut more later, but you can’t put the cord back once it’s been snipped.
Brushing the fringe is a transformative step in the Macrame Owl – Tutorial. Using a macrame comb, gently brush out the ends of the cords until they are fluffy and soft. This mimics the look of feathers and gives your Macrame Owl – Tutorial project a professional, high-end boutique finish that looks great in photos.
To ensure your Macrame Owl – Tutorial stays in place, you can apply a light mist of fabric stiffener or even hairspray to the brushed-out sections. This prevents the fringe from tangling or losing its shape over time, especially if the wall hanging is placed in a high-traffic area or near a window with a breeze.
Placement is everything when it comes to handmade decor. Your finished Macrame Owl – Tutorial project will look best against a solid-colored wall where the shadows of the knots can create extra depth. Neutral walls like white, sage green, or terracotta really make the natural cotton fibers stand out.
If you are creating this Macrame Owl – Tutorial for a gift, consider the packaging. Rolling the owl carefully and including a small note about the handmade process adds a personal touch. This project is a wonderful way to show someone you care, as it represents hours of focused craftsmanship and artistic intent.
Finally, take a moment to appreciate the “imperfections” in your Macrame Owl – Tutorial. Handmade items are not meant to look factory-made. A slightly tilted head or a unique knot variation gives your owl personality. Sharing your work on social media can also inspire other crafters to start their own journey into the world of macrame.
FAQ – Frequently Asked Questions
What is the best cord for a Macrame Owl – Tutorial?
For the best results, use a 3mm or 4mm single-strand or 3-strand cotton cord. The 3-strand twist is more durable and easier for beginners to handle without the fibers fraying too early.
How long does it take to finish a Macrame Owl – Tutorial?
Depending on your experience level, a standard-sized owl typically takes between 2 to 5 hours. Beginners should take their time to ensure the knot tension is consistent throughout the project.
Can I wash my Macrame Owl?
It is not recommended to machine wash macrame wall hangings. Instead, use a lint roller or a soft brush to remove dust. If a stain occurs, spot clean with a damp cloth and mild soap, but avoid soaking the fibers.
Where can I find the beads for the owl’s eyes?
Most craft stores or online retailers carry wooden beads. For a standard owl, look for beads that are 20mm to 30mm in diameter with a large center hole to accommodate multiple cords.
Is this Macrame Owl – Tutorial suitable for beginners?
Yes! While it looks complex, it only uses basic knots like the Square Knot and Half Hitch. If you follow the steps slowly, even a first-time macrame artist can achieve a beautiful result.
Conclusion
In this Macrame Owl – Tutorial, we have covered everything from selecting the right sustainable materials to mastering the Square Knot and Double Half Hitch. We explored the importance of symmetry in the head and wings, and how to add personality through wooden beads and brushed fringe.
This project is more than just a piece of decor; it is a relaxing exercise in mindful crafting that results in a beautiful, tactile piece of art. Whether you are making this for your own home or as a thoughtful gift, the skills learned here will serve as a foundation for many more fiber art projects in the future.