If you’re looking for a practical and eco-friendly sewing project, the DIY easy bottle bag – pattern is a perfect place to start.
This simple yet stylish project lets you create a reusable bag designed specifically to carry bottles securely, whether it’s for water, wine, or your favorite juice.
Perfect for gifting or everyday use, it’s a fantastic way to reduce plastic use while learning new crafting skills.
Creating a DIY easy bottle bag – pattern at home allows you to personalize your design using fabrics and features that suit your taste or occasion. Whether you prefer colorful prints, minimalist tones, or sturdy canvas materials, this pattern adapts easily. It’s also an excellent beginner-friendly project, making it ideal for those just starting to explore the world of sewing and handmade accessories.
In this article, we’ll explore how to craft your very own bottle bag step by step. We’ll cover the necessary tools, helpful construction techniques, and creative ideas to personalize your design. You’ll also find an informative FAQ and a clear conclusion summarizing the key points. Let’s get started on creating a functional and fashionable DIY easy bottle bag – pattern you’ll be proud to use or give away.
1. What Is a DIY Easy Bottle Bag – Pattern?
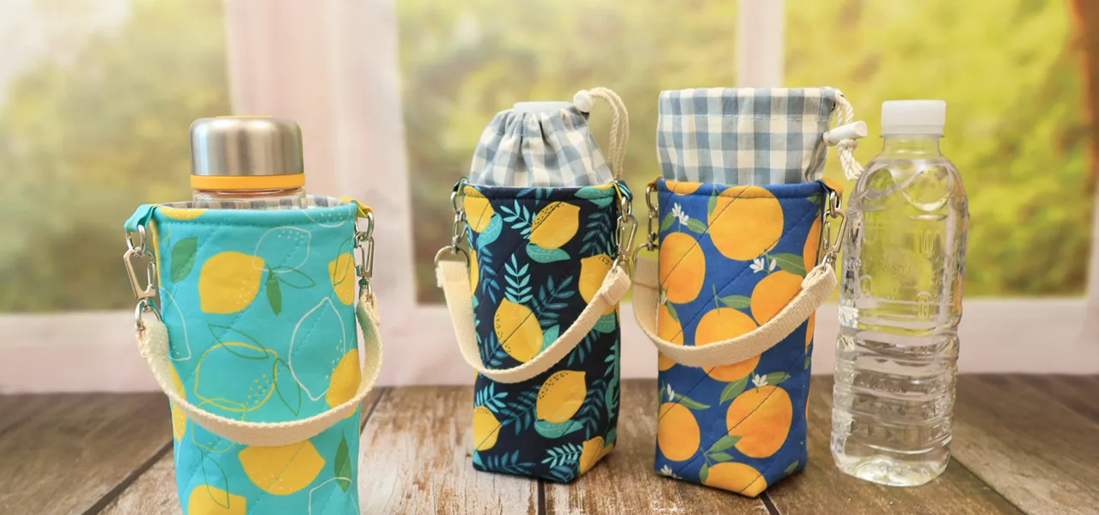
The DIY easy bottle bag – pattern is a sewing guide that helps you create a vertical, cylindrical fabric bag intended to carry bottles. These bags are designed with both form and function in mind. Their tall and narrow shape cradles a bottle securely, while handles or drawstrings provide easy carrying and closure.
This pattern is a favorite among DIY enthusiasts because it’s quick to make, doesn’t require a lot of fabric, and offers impressive results. In most cases, it takes less than an hour to complete, especially if you’re using a basic design with minimal embellishments.
The bag typically includes a flat circular base, a main body piece, and a handle or tie. Some versions also include insulation layers, inner linings, or padding to protect the bottle inside—particularly useful for glass containers or when carrying wine or delicate drinks.
One of the best things about using a DIY easy bottle bag – pattern is its flexibility. You can adjust the size to accommodate larger or smaller bottles, or even tweak the shape to make a wider version for holding multiple items. With just a few modifications, this simple pattern transforms into a customizable craft project.
Additionally, this pattern is a great way to reduce waste. Instead of using gift wrap or plastic bags, you can present a bottle in a reusable, handmade fabric bag. It’s a sustainable and thoughtful solution that adds a personal touch to gift-giving.
Whether you’re making one for yourself, as a housewarming present, or as part of your handmade shop’s product line, this pattern is an excellent choice for combining utility, style, and sustainability.
2. Materials and Tools Needed for the Bottle Bag
To get started on your DIY easy bottle bag – pattern, you’ll need a few basic supplies. Fortunately, this project doesn’t require expensive materials or advanced equipment, making it perfect for beginners and seasoned sewists alike.
Start by selecting your fabric. Cotton, canvas, or linen are excellent choices due to their durability and ease of sewing. You can also repurpose old garments or leftover fabric scraps, adding a creative, eco-friendly element to your project.
You’ll need a piece of fabric for the outer layer and one for the lining. A third optional layer—insulated batting or foam—can be added between these two layers to help keep your drink cool and the bottle protected.
Next, gather your tools: a sewing machine, scissors or rotary cutter, a ruler or measuring tape, pins or clips, and a fabric marker or chalk. An iron and ironing board will help you press seams for a professional finish.
For the closure, you have a few options. You can add a drawstring using ribbon, cord, or shoelace. Alternatively, sew on a flap with Velcro or add a button loop if you prefer a decorative closure.
Handles are another customization point. For a simple carry, use cotton webbing or make fabric straps from your chosen materials. You can place a single strap at the top or two short handles for easier lifting.
Lastly, consider embellishments. Labels, embroidery, patches, or heat-transfer vinyl designs add a personal or branded touch. These additions won’t affect the pattern’s functionality but can make your bottle bag more unique and meaningful.
3. How to Sew the DIY Easy Bottle Bag – Pattern
Now let’s walk through how to actually sew your DIY easy bottle bag – pattern. This step-by-step guide will help you complete the project efficiently and with confidence, even if it’s your first time sewing a structured bag.
Start by cutting your fabric: one rectangle for the outer body (usually about 12 x 15 inches), one for the lining of the same size, and two circles for the base (outer and lining). If using batting, cut it slightly smaller to reduce bulk in the seams.
Begin by sewing the short edges of the outer rectangle together, right sides facing, to form a tube. Repeat this step for the lining. Then, pin and sew the circular base to the bottom edge of the tube. This step might be a bit tricky—use plenty of pins and sew slowly for accuracy.
If you’re adding a drawstring casing, fold over the top edge of the outer fabric about 1 inch and sew a channel, leaving a small gap to insert the string later. For handles, pin them in place before attaching the lining.
Next, place the outer bag inside the lining with right sides facing each other, aligning the top edges. Sew around the top edge, leaving a 2–3 inch gap for turning the bag right side out.
Once sewn, turn the bag right side out through the gap. Push the lining into the outer bag and press the top edge flat. Topstitch around the top edge to close the gap and secure the structure. If using a drawstring, feed it through the casing using a safety pin.
Your bottle bag is now complete! It should stand upright, hold a standard bottle securely, and look great. Try inserting a wine bottle or reusable water bottle to test the fit and adjust your next version as needed.
4. Creative Ways to Use and Customize Your Bottle Bag
One of the joys of working with the DIY easy bottle bag – pattern is how customizable it is. With just a few tweaks, you can tailor it to different occasions, preferences, or purposes, making it an endlessly useful pattern.
For gift-giving, create themed bottle bags for holidays, birthdays, or special events. Use festive fabrics, personalized labels, or color schemes that match the occasion. It turns a simple bottle of wine into a memorable gift.
If you want to make it more eco-conscious, consider upcycling old jeans, towels, or shirts into bottle bags. This not only reduces waste but also adds unique texture and charm that store-bought materials can’t replicate.
For practical everyday use, design a bottle bag with a longer shoulder strap so you can carry your water bottle hands-free while walking, hiking, or biking. Add a small pocket for keys or cash to make it even more functional.
You can also use the same DIY easy bottle bag – pattern to make bags for thermoses, baby bottles, or insulated flasks. Simply adjust the measurements based on the dimensions of the container you plan to carry.
If you’re into selling handmade goods, bottle bags are a great product to offer. They’re quick to make, don’t require a lot of materials, and appeal to a wide audience—especially those interested in zero-waste and handmade lifestyles.
And finally, don’t forget the power of personalization. Add embroidered initials, logos, or decorative stitches to turn each bottle bag into a unique statement piece. These little details can elevate your creation from simple to stunning.
FAQ: DIY Easy Bottle Bag – Pattern
What size bottle fits best in this pattern?
A standard wine or water bottle (750ml) typically fits well in the base pattern. You can adjust the height and width to suit other sizes.
Is this pattern suitable for beginners?
Yes! The DIY easy bottle bag – pattern uses basic sewing techniques and is perfect for those just getting started with sewing projects.
Do I need a sewing machine?
While a sewing machine speeds up the process, you can sew this bag by hand using a backstitch for durability.
Can I make this bag waterproof?
Yes. Use waterproof lining material like PUL or laminated cotton to make your bag suitable for cold drinks or wet bottles.
How do I clean the finished bottle bag?
Most fabric bottle bags are machine washable in cold water. Use gentle detergent and air-dry to maintain their shape.
Can I add padding for extra protection?
Absolutely. Add a layer of foam or quilt batting between the outer fabric and lining to protect glass bottles and provide insulation.
Conclusion
Creating a DIY easy bottle bag – pattern is not only a rewarding craft project but also a practical solution for carrying bottles in style. This guide has walked you through the essentials—what the pattern is, how to choose your materials, step-by-step instructions for sewing, and ways to customize your finished product.
Whether you’re making one for yourself, as a thoughtful handmade gift, or to sell at markets or online shops, this versatile pattern allows endless creativity. Plus, you’re contributing to a more sustainable lifestyle by replacing single-use bags with reusable fabric alternatives.
We’d love to hear from you! Share your honest opinion about this tutorial, ask questions, or offer suggestions for future content