A Patchwork tutorial quilt – pattern is a fantastic project for quilters of all levels, whether you’re just beginning or have been quilting for years.
Patchwork quilting is a timeless technique that involves piecing together various fabric patches to create a cohesive and beautiful design.
The Patchwork tutorial quilt – pattern is one of the best ways to practice this skill and make something both functional and artistic.
Whether you’re looking to make a cozy quilt for your home or create a handmade gift, patchwork quilts offer endless possibilities for creativity and expression.
In this article, we’ll walk you through everything you need to know to create your own patchwork quilt. From choosing fabrics to cutting the pieces, assembling the blocks, and finally piecing them all together, we’ll cover the basics and provide step-by-step guidance. By the end of this tutorial, you’ll have a beautiful, completed quilt and the knowledge to take on future quilting projects with confidence.
The Patchwork tutorial quilt – pattern we will focus on today is a great starter project for beginners, but also offers enough depth to keep more experienced quilters engaged. This step-by-step guide will help you develop a strong understanding of patchwork techniques, so you can continue building on your skills and tackle more complex designs as you go.
1. Understanding Patchwork and Choosing Your Fabrics
Before diving into the sewing machine, the first step in making a Patchwork tutorial quilt – pattern is understanding the foundation of patchwork itself. Patchwork quilting involves combining small pieces of fabric, called patches, into larger blocks to create a beautiful, cohesive design. The fun part is that there’s no limit to the types of fabrics or patterns you can choose, so your quilt can reflect your unique style.
Selecting Fabrics
When choosing fabrics for your quilt, it’s important to select colors and patterns that complement each other. For a cohesive look, pick fabrics that share a similar color palette or pattern style. You can opt for a traditional combination of floral prints, solids, and stripes, or mix modern geometric patterns for a more contemporary feel. A good rule of thumb is to choose three to five different fabrics for your patchwork blocks, ensuring they blend well together but still create contrast.
Fabric Types
Cotton is the most popular fabric choice for quilting, and it’s highly recommended for beginners due to its durability and ease of use. Additionally, cotton holds its shape well, making it easier to work with. If you want to add texture or depth to your quilt, you can incorporate other fabrics like flannel or linen.
Pre-Cut Fabrics vs. Cutting Your Own
You can either use pre-cut fabric squares, such as charm packs or jelly rolls, or cut your own fabric. If you choose to cut your fabric, a rotary cutter and mat will help you get precise cuts, making it easier to assemble your quilt blocks. Cutting your own fabric also gives you more flexibility to customize the sizes and shapes of your patches.
Color Theory for Quilting
Understanding basic color theory can help elevate your Patchwork tutorial quilt – pattern. When choosing colors, consider the effect you want to achieve. For instance, using a monochromatic color scheme creates a more subtle look, while a contrasting color palette creates a bolder design. Play with light, medium, and dark values to add depth and dimension to your quilt.
Choosing a Quilt Block Pattern
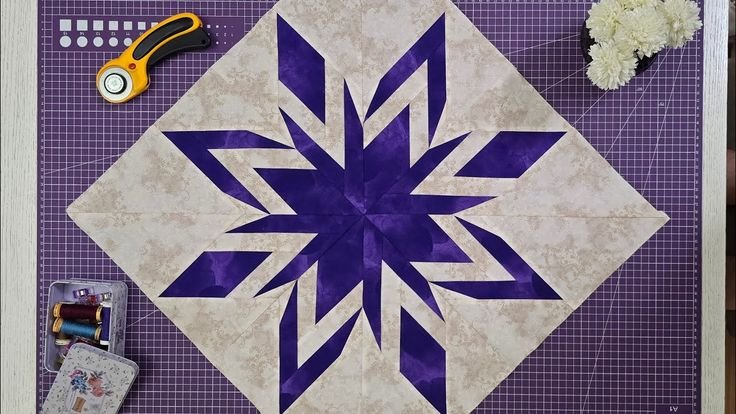
The Patchwork tutorial quilt – pattern can be made up of various block designs, such as nine-patch, log cabin, or star blocks. For beginners, starting with simple block patterns can help you get comfortable with the process, but as you gain experience, you can experiment with more intricate designs. Choose a pattern that excites you, and that you feel confident you can complete.
Preparing Fabric for Quilting
Once you have your fabrics, it’s essential to pre-wash them to prevent shrinking after your quilt is finished. Wash and dry the fabric in the same manner you’ll care for the finished quilt. After washing, press your fabrics with an iron to eliminate wrinkles, ensuring that they are smooth and easy to cut.
2. Cutting Your Fabric for the Patchwork Quilt Blocks
Now that you’ve chosen your fabrics, it’s time to cut them into the pieces that will form your Patchwork tutorial quilt – pattern. Accurate cutting is crucial for a well-made quilt, as uneven or incorrectly sized pieces can lead to a wonky, uneven quilt. Here’s how to do it properly:
Step 1: Measure and Cut Your Fabric
Use a rotary cutter and quilting ruler to measure and cut your fabric. Start by cutting your fabric into strips according to the measurements provided in your pattern. Once the strips are cut, slice them into smaller pieces or squares, depending on your chosen quilt block design.
Step 2: Organize the Pieces
Once your fabric is cut, organize your pieces into separate piles or bags for each block. This organization will save you time when assembling the quilt blocks later. Be sure to keep track of how many pieces you need for each block to avoid running out of fabric mid-project.
Step 3: Consistency is Key
As you cut your fabric pieces, make sure each piece is cut consistently. For example, if your pattern calls for 2.5-inch squares, make sure all of them are exactly the same size. This precision will make piecing your blocks together easier and will result in a cleaner finished quilt.
Step 4: Cutting Tips
Use a sharp rotary cutter and replace the blade regularly to ensure smooth cuts. Also, always cut fabric on a flat surface, like a cutting mat, to protect both your cutter and the surface underneath.
Step 5: Fabric Layout
Before you start sewing, lay out the pieces on a flat surface to check the arrangement. This is a good time to see how the colors and patterns work together. Rearranging the pieces at this stage can help you avoid any major design mistakes later on.
Step 6: Prepare for Sewing
Once your pieces are organized and laid out, you’re ready to start sewing. Prepare your sewing machine with the appropriate thread and settings. You’ll typically use a 1/4-inch seam allowance for patchwork quilting, so make sure your machine is set up for this.
3. Sewing the Patchwork Blocks
Now it’s time to start assembling your Patchwork tutorial quilt – pattern. This is where your pieces will come together to form beautiful quilt blocks. Here’s a step-by-step guide to help you sew your quilt blocks:
Step 1: Start by Piecing the Blocks
Begin by sewing the individual pieces of your quilt blocks together. Always make sure to align the edges properly and use pins or clips to hold the fabric in place. Use a 1/4-inch seam allowance, which is the standard for most quilt patterns. Sew along the edges, keeping your seams straight and even.
Step 2: Press the Seams
After you’ve sewn two pieces together, press the seams open with an iron. Pressing is an important step in quilting because it helps your blocks lie flat and ensures a clean finish. Be careful not to stretch the fabric as you press it.
Step 3: Assemble the Full Block
Once you’ve pieced together smaller sections of your block, continue to add pieces until the entire block is complete. Double-check your measurements and alignment as you go along to ensure the block is square and even.
Step 4: Check for Accuracy
Before moving on to the next block, measure your completed block to ensure it matches the size specified in your pattern. If it’s slightly off, don’t hesitate to trim it down to size.
Step 5: Repeat for All Blocks
Continue the process for all of the blocks in your quilt. Depending on the size of your quilt, you may need to make dozens of blocks. Try to maintain consistency in the stitching and pressing throughout.
Step 6: Final Pressing
After all the blocks are sewn together, give them a final press to smooth out any wrinkles and prepare them for assembly into the quilt top.
4. Assembling the Quilt and Finishing Touches
After completing all of your quilt blocks, it’s time to assemble the quilt top and add the finishing touches. Here’s how to complete your Patchwork tutorial quilt – pattern:
Step 1: Arrange the Blocks
Lay out all of your completed quilt blocks in the desired layout. This step will help you visualize the finished quilt and make sure the colors and patterns flow well together.
Step 2: Sew the Blocks Together
Begin sewing the blocks together in rows, using a 1/4-inch seam allowance. After each row is complete, sew the rows together to form the quilt top.
Step 3: Add the Border (Optional)
Some patchwork quilts feature a border around the edges. If your pattern includes a border, cut fabric strips to the correct size and sew them around the perimeter of the quilt top.
Step 4: Layer the Quilt
Once your quilt top is assembled, it’s time to layer the quilt. Lay the quilt backing fabric flat on a surface, followed by the batting, and finally the quilt top. Pin the layers together to prevent them from shifting during quilting.
Step 5: Quilt the Layers
Quilt the layers together using your preferred quilting method, such as straight-line quilting or free-motion quilting. This will secure the layers and give your quilt its finished texture.
Step 6: Add the Binding
The final step is to add the quilt binding. This is the fabric that wraps around the edges of your quilt to give it a clean and professional look. Fold the binding over the edges and sew it in place for a polished finish.
FAQ (Frequently Asked Questions)
1. How do I select the best fabrics for my patchwork quilt?
For a patchwork quilt, it’s best to choose fabrics that complement each other in color and pattern. You can use solid fabrics, prints, or a combination of both, depending on the effect you want to achieve. It’s important to balance contrasting fabrics for a cohesive design.
2. Can I make a patchwork quilt by hand instead of using a sewing machine?
Yes, patchwork quilts can be sewn by hand, though using a sewing machine will make the process much faster and more efficient. Hand-sewing may take more time, but it can add a unique, personal touch to your quilt.
3. What are some popular quilt block patterns for patchwork quilts?
Popular quilt block patterns include the nine-patch, log cabin, flying geese, and star blocks. These are all great choices for a Patchwork tutorial quilt – pattern and can be mixed and matched to create different designs.
4. How do I prevent my quilt blocks from becoming uneven?
Accurate cutting and consistent seam allowances are key to keeping your quilt blocks even. If necessary, use a quilting ruler and rotary cutter for precise cuts. Pressing your seams as you go also helps keep everything aligned.
Conclusion
In this Patchwork tutorial quilt – pattern guide, we’ve covered everything from selecting fabrics to cutting, sewing, and finishing your quilt. With these techniques and tips, you’ll be well on your way to creating a beautiful patchwork quilt that you can be proud of. Quilting is a rewarding craft that combines creativity, patience, and skill. We hope you found this guide helpful, and we’d love to hear your thoughts, questions, and suggestions in the comments below. Happy quilting!