If you love cozy, handmade clothing with a touch of charm and whimsy, the Heart Patchwork Crochet Cardigan – Pattern is a delightful project to explore.
This unique pattern combines the warmth of a classic crochet cardigan with the visual appeal of heart-shaped patchwork, making it a wearable piece of art.
Perfect for chilly seasons, thoughtful gifts, or simply showcasing your creativity, this cardigan is as fun to make as it is to wear.
The beauty of the Heart Patchwork Crochet Cardigan – Pattern lies in its blend of traditional crochet techniques with modern, playful design. Each heart patch can be crafted in a different color or shade, giving the cardigan a personalized, quilt-like feel. Whether you want to stick to a cohesive color palette or go bold and colorful, this project offers endless room for customization.
In this guide, we’ll walk you through everything you need to know about this pattern—from materials and preparation to stitching techniques and styling ideas. With clear instructions and a humanized approach, you’ll be able to create your own heartfelt masterpiece, whether you’re a beginner or a seasoned crocheter. Let’s dive into the heart of it all and bring your cardigan vision to life.
1. What Is the Heart Patchwork Crochet Cardigan – Pattern?
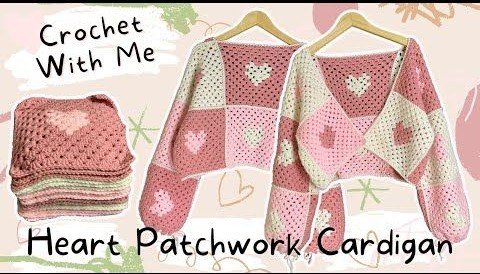
The Heart Patchwork Crochet Cardigan – Pattern is a stylish, handmade cardigan constructed by combining individual heart-shaped or square patches that feature a heart motif. These patches are joined together to form the body, sleeves, and sometimes the hood or collar of the garment. It’s a cozy, statement-making piece that speaks to both crochet tradition and modern fashion trends.
Typically, the pattern uses a combination of double crochet, half double crochet, and chain stitches to create the structure of the hearts and their surrounding squares. Some versions of the pattern allow for open hearts or color changes within the hearts to create dimension. The modular nature of this pattern makes it easy to adapt in size and color.
One of the reasons crafters love this pattern is its accessibility. You can build the cardigan one block at a time, making it ideal for crocheting on-the-go or breaking the project into manageable steps. It’s also great for using up leftover yarn—each heart patch is a small canvas for color experimentation.
The cardigan construction typically involves creating a set number of heart squares, laying them out in a grid to form the front and back panels, and joining them with slip stitches or whipstitch. Sleeves are made in a similar fashion and attached after the main body is complete.
The Heart Patchwork Crochet Cardigan – Pattern is versatile enough to suit different styles. You can create a cropped, fitted cardigan or a long, oversized coat-style version depending on how many squares you use and how you assemble them. Button closures, belts, or open-front designs add even more variation.
It’s a project that celebrates love, color, and creativity all in one. Whether you’re crafting it as a gift for someone special or for your own wardrobe, it’s a rewarding pattern that combines warmth and personality.
2. Materials and Tools You’ll Need
Before starting your Heart Patchwork Crochet Cardigan – Pattern, it’s important to gather all the necessary tools and materials. Preparing your supplies ahead of time ensures a smooth and enjoyable crochet experience.
Start with your yarn selection. Worsted weight yarn is commonly used for this pattern because it offers warmth and structure without being too bulky. Cotton, acrylic, or wool blends all work well. Choose contrasting or complementary colors for your heart patches and background for best visual effect.
You’ll also need a crochet hook that matches the yarn weight—typically a size H/8 (5.0 mm) or I/9 (5.5 mm). Check your yarn label for recommendations, and make a small gauge swatch to ensure your squares come out to the intended size. Consistency in tension is key to a cardigan that fits correctly.
A tapestry needle will be necessary for weaving in ends and joining squares together. Stitch markers can help you keep track of rows or shape changes, especially when working on sleeve shaping or necklines.
Don’t forget a measuring tape or ruler to ensure your finished squares are consistent in size. This will make assembling the cardigan much easier and help ensure a balanced and professional-looking final piece.
If you plan to add buttons, belts, or decorative trims, gather those now too. Wooden buttons, vintage finds, or even crocheted toggles can add character to your finished cardigan. Consider lining the cardigan or adding pockets for extra functionality.
Finally, keep your pattern handy—whether it’s printed out or saved digitally. Having a clear visual or chart of the heart motif can help as you work, especially when managing color changes or different square sizes.
3. Stitching and Assembling Your Cardigan
Now that you have your materials ready, it’s time to dive into the crochet process. The Heart Patchwork Crochet Cardigan – Pattern begins with making multiple heart motif squares. Each square acts like a building block for the final garment.
Start by creating the heart motif. Most designs begin with a magic ring or chain circle, working in the round to form the heart shape using a combination of stitches. The heart is then squared off with additional rounds, which make it easier to join to other blocks later.
Once you’ve completed one square, repeat the process until you have enough squares for your desired size. A typical cardigan may use 30 to 60 squares, depending on the size and whether you want it cropped or full-length. Lay out the squares on a flat surface and arrange them to your liking before joining.
Joining methods vary. Some crocheters prefer a seamless join using slip stitch or single crochet, while others sew squares together with a whipstitch or mattress stitch. Whichever method you choose, make sure your joins are even and secure.
After assembling the body panels (front, back, and sleeves), it’s time to seam them together. Start by joining shoulder seams, then attach the sleeves. Finally, sew the side seams and underarm sections. Try on the garment as you go to check fit and comfort.
Add finishing touches such as cuffs, a collar, or a button band. Ribbed or shell edging can give your cardigan a polished look. Don’t forget to weave in all loose ends with your tapestry needle and block your cardigan for the final shape.
Washing and blocking the finished cardigan ensures that all your squares lay flat and the garment fits as expected. Follow your yarn’s care instructions and shape the cardigan while damp for best results.
4. Styling and Customization Ideas
Once you’ve completed your Heart Patchwork Crochet Cardigan – Pattern, the fun doesn’t stop there. Styling and customizing your cardigan adds personality and extends its wearability across seasons and occasions.
Try a monochrome color scheme for a minimalist, modern take. Use shades of cream, grey, or black for a neutral piece that pairs easily with any outfit. Or go bold with rainbow hearts on a solid black or white background for a statement look.
Add embroidered embellishments inside the hearts—initials, symbols, or tiny flowers—to make each square a personal signature. This makes the cardigan even more special if you’re giving it as a gift.
Experiment with different yarn textures. Mix matte and shiny finishes, or combine different fiber types for unique results. For example, using a velvet yarn for the hearts adds softness and a luxurious touch.
Consider adding a hood or a longer hemline for a cozy winter coat effect. Extending the square count can easily turn the cardigan into a duster or robe-like wrap that’s perfect for lounging or layering.
Pair your heart patchwork cardigan with jeans, dresses, or skirts. It works well as a statement piece over simple outfits, or as a playful layer in casual wear. Add a belt at the waist for a fitted silhouette.
You can also use the same motif to create matching accessories like a beanie, scarf, or tote bag. Coordinated crochet sets are trending and give you more ways to showcase your beautiful handmade work.
FAQ: Heart Patchwork Crochet Cardigan – Pattern
Is the Heart Patchwork Crochet Cardigan – Pattern suitable for beginners?
Yes, especially if you’re familiar with basic crochet stitches like double crochet and chain stitch. The modular structure allows beginners to learn at a comfortable pace.
How long does it take to make this cardigan?
Depending on your experience and the complexity of your design, it can take anywhere from a week to several weeks to complete.
What yarn is best for this pattern?
Worsted weight yarn is ideal. Cotton blends work well for spring and summer, while acrylic or wool blends are better for cooler months.
Can I adjust the size of the cardigan easily?
Yes! Simply increase or decrease the number of heart squares in your layout to adjust the size. You can also modify sleeve or body length.
How should I wash my finished cardigan?
Always check your yarn label. Most handmade cardigans should be hand-washed in cold water and laid flat to dry to preserve their shape.
Can I sell cardigans made from this pattern?
Yes, if the pattern is labeled as available for commercial use. Always credit the pattern designer if required, and create your own unique finished items.
Conclusion
The Heart Patchwork Crochet Cardigan – Pattern offers a joyful and creative way to express yourself through crochet. Combining warmth, comfort, and heartfelt design, this cardigan is more than just a garment—it’s a project that brings love and color into your wardrobe or gift box.
In this guide, we explored the essence of the pattern, materials you
need, how to crochet and assemble the squares, and tips for styling and customizing. With patience and creativity, you can craft a cardigan that reflects your personal touch.
We hope this article has inspired you to pick up your hook and get started. If you enjoyed it or have questions, please leave a sincere opinion or suggestions in the comments. Your feedback helps us support and grow this beautiful DIY community!