A sewing organizer tutorial is exactly what you need to transform a chaotic crafting space into a beautifully arranged, highly efficient creative haven. Whether you are a seasoned quilter with decades of experience or a beginner who just purchased your first machine, a dedicated craft storage solution keeps your essential tools within arm’s reach and protects your materials from damage. Instead of wasting precious creative time digging through cluttered drawers for that specific pair of fabric shears or a matching shade of thread, a personalized DIY sewing organizer allows you to focus entirely on the joy of making.
Creating your own fabric sewing organizer is not only a practical project but also a wonderfully sustainable way to clear out your stash of scrap fabrics or upcycle materials like sturdy denim and old cotton prints. This comprehensive step-by-step sewing tutorial will guide you through the entire process of designing, cutting, and assembling a versatile organizer that can be hung on a wall, draped over your sewing table, or folded away for travel. By tailoring the pocket sizes and layout to your personal inventory, you will create a custom workspace organization system that fits your unique crafting habits perfectly.
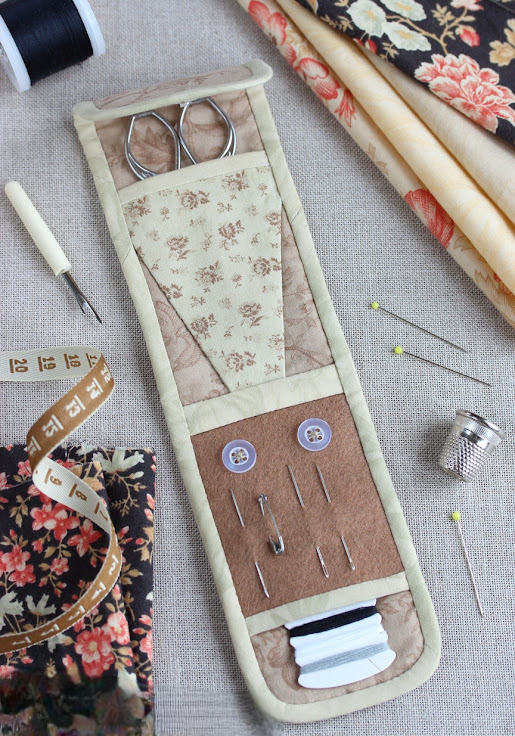
In this detailed sewing organizer tutorial, we will explore how to craft a durable, multi-pocket utility organizer designed to hold everything from acrylic rulers and rotary cutters to seam rippers, bobbins, and safety pins. We will use easy-to-follow techniques that ensure clean edges, sturdy pockets, and a professional finish that can withstand the daily wear and tear of a busy creative room. Let’s gather your materials, thread your machine, and dive into this rewarding project that will elevate your sewing room decor while maximizing your productivity.
1. Gathering Materials and Preparing Your Fabric Base
Before diving into the actual assembly, the first crucial phase of this sewing organizer tutorial is selecting the right materials to ensure longevity and structural integrity. A great DIY organizer requires a heavy-duty fabric for the main backing to support the weight of your heavy steel fabric scissors, rotary cutters, and numerous thread spools. Consider using thick canvas, duck cloth, or upcycled denim from old jeans, which provides an excellent, rigid foundation while remaining highly sustainable.
For the pockets, you can play with contrasting colors, vibrant quilting cotton prints, or even heavy-duty clear vinyl if you prefer a transparent sewing pocket system to see your tools easily. Using contrasting fabrics not only makes your handmade storage solution visually stunning but also makes it much easier to spot empty pockets when cleaning up your workspace.
In addition to your main fabrics, you will need a firm fusible interfacing or batting to sandwich between the front and back panels of your wall-hanging organizer. This stabilizer prevents the organizer from sagging or warping when filled to maximum capacity with your favorite quilting tools and notions.
You will also need standard sewing supplies to complete this project, including a reliable rotary cutter, an acrylic quilting ruler, a cutting mat, heavy-duty thread, and a fabric marking pen. Don’t forget to prepare matching bias tape for binding the edges, or you can easily create your own custom binding using matching fabric scraps.
Pre-washing all your natural fiber fabrics is a critical step in this fabric sewing organizer tutorial to avoid any future shrinkage or warping if you ever need to wash it. Press your fabrics thoroughly with a hot iron to remove any wrinkles, ensuring that your cutting measurements will be completely precise and accurate.
Once your materials are pressed and ready, clear a large flat workspace to lay out your pieces, ensuring your sewing machine is fitted with a fresh, sharp needle appropriate for heavier fabrics. Taking these extra minutes to prepare your environment guarantees a smoother, more enjoyable crafting experience with a much more professional finish.
2. Cutting and Interfacing Your Pattern Pieces
To ensure your finished project looks neat, you must follow precise cutting measurements during this sewing organizer tutorial to keep everything perfectly aligned. For a standard, highly versatile wall-hanging sewing organizer, cut one large main rectangle measuring 18 inches wide by 24 inches tall from your heavy backing fabric. Repeat this exact measurement for the back lining piece and your heavy-duty fusible interfacing to create a sturdy, three-layer sandwich.
Next, we will cut the fabric strips that will eventually form our multi-tiered sewing room pocket storage. Cut three distinct fabric strips measuring 18 inches wide by 7 inches tall for the lower and middle pocket rows, which are ideal for larger tools. For the top row, which is perfect for smaller items like water-soluble markers and seam rippers, cut a strip measuring 18 inches wide by 5 inches tall.
To give your pockets extra durability so they don’t stretch out over time when holding bulky items, cut coordinating strips of lightweight fusible interfacing for each pocket piece. Fuse the interfacing to the wrong side of your pocket fabrics using a hot iron and plenty of steam, following the manufacturer’s specific instructions carefully.
Now, let’s prepare the top edge of each pocket row to create a clean, professional appearance that resists fraying from constant daily use. Fold the top edge of each pocket strip down toward the wrong side by a quarter of an inch, press it flat, and then fold it over another quarter of an inch.
Take your pieces to the machine and topstitch close to the inner folded edge of each pocket top using a matching or contrasting decorative heavy thread. This simple step creates a beautifully clean, reinforced edge that will keep your handmade pocket organizer looking brand new for years to come.
If you plan to hang your finished piece using a wooden dowel or a small curtain rod, now is the perfect time to cut three small fabric strips measuring 3 inches by 4 inches to create hanging loops. Fold these loops lengthwise, stitch down the long edge, turn them right-side out, and press them flat so they are ready for final assembly.
3. Designing and Stitching the Custom Tool Pockets
This is the stage of the sewing organizer tutorial where you can truly customize the layout to fit your specific inventory of quilting and crafting tools. Lay your interfaced main backing fabric completely flat on your cutting mat with the right side facing up, and grab your handy heat-erasable fabric marking pen. Place your first prepared pocket strip along the bottom edge of the backing fabric, aligning the raw bottom and side edges perfectly together.
Before stitching, use your acrylic ruler to mark vertical lines where you want to divide the long strip into individual, customized sewing tool pockets. For instance, you can mark a wide 6-inch pocket for your rotary cutter, a narrow 2-inch pocket for pens, and a medium 4-inch pocket for embroidery scissors.
To create expandable pleats for bulkier items like tape measures or thick pin cushions, mark lines that are slightly wider than the backing space and fold small pleats at the bottom. Pin the pocket strip securely along your marked lines, making sure the fabric lies completely flat and square against the heavy backing material.
Take the assembly to your sewing machine and stitch directly along your vertical marked lines, starting from the bottom edge and moving up to the reinforced top of the pocket. Be sure to backstitch firmly several times at the top of each pocket opening, as these specific areas experience the most stress when inserting and removing tools.
Once the bottom row is secured, position your second pocket strip approximately 2 inches above the top edge of the first row, repeating the marking and pinning process. This multi-tiered layout maximizes your vertical workspace, providing ample craft room organization without taking up valuable table real estate.
Repeat this exact process for the remaining top pocket row, adjusting the vertical divider compartments to hold smaller notions like bobbins, safety pins, and needle cases. Once all three pocket rows are stitched down, sew a baste stitch a quarter-inch away from the outer edges to hold all the layers together securely.
4. Final Assembly and Edge Binding Techniques
We have reached the final assembly phase of our sewing organizer tutorial, where we bring all the components together for a polished, durable finish. Place your main back lining fabric face down on your table, place your fused main organizer piece face up on top of it, and pin the entire perimeter heavily. If you chose to add hanging loops, fold them in half and sandwich the raw edges between the layers at the top edge, spacing them out evenly.
To give your DIY fabric organizer a clean, high-end look, we will use double-fold bias tape to bind all four raw outer edges simultaneously. You can use a contrasting color of commercial bias tape to add a fun pop of color, or make your own for a seamless, cohesive design.
Open up one side of your double-fold bias tape and align its raw edge with the raw edge of your organizer on the back side, leaving a small tail at the start. Stitch along the first crease line of the bias tape through all the heavy layers of fabric, pivoting carefully at each 90-degree corner to create clean, mitered corners.
Once all four sides are stitched, flip the bias tape over to the front side of the organizer, completely enclosing all the raw fabric edges inside. Pin or clip the folded edge of the binding securely in place on the front, ensuring it just covers your previous row of stitching.
Using a matching thread, carefully topstitch or “stitch in the ditch” right along the inner edge of the binding on the front side of your piece. Go slowly over the thick areas where the pocket layers meet the outer edge, using a heavy-duty jeans needle to prevent any skipped stitches or thread breakages.
Give your completed project one final, thorough press with a hot steam iron to set all your beautiful stitches and flatten the layers completely. Insert your wooden dowel through the top loops, tie a piece of rustic twine to each end, and your gorgeous new craft room organizer is officially ready to hang.
FAQ
What are the best fabrics to use for a durable sewing organizer?
The best fabrics for the main body are heavy-duty, tightly woven materials such as canvas, duck cloth, denim, or heavy linen. These fabrics offer the structural integrity needed to hold heavy metal tools without sagging. For the pockets, you can use standard quilting cotton, but it should be reinforced with a medium-weight fusible interfacing to prevent stretching over time.
How do I clean my handmade fabric sewing organizer?
If you used 100% cotton, canvas, and washable interfacing, you can spot clean your organizer with a damp cloth and mild detergent. For a deeper clean, remove all tools and the wooden dowel, then hand wash it in cold water and lay it flat to dry. Avoid using a dryer, as high heat can warp the interfacing and cause the pockets to lose their shape.
Can I make this project if I am a complete beginner?
Yes, absolutely! This project is highly recommended for beginners because it involves straight lines, basic measuring, and fundamental sewing skills like topstitching and binding. It is a fantastic, low-risk way to practice fabric alignment, interfacing application, and pocket construction while creating something incredibly useful for your craft room.
How do I customize the pocket sizes for specific quilting tools?
Before stitching the vertical lines on your pocket rows, lay your actual tools (like your favorite fabric shears, rotary cutter, or acrylic rulers) directly onto the fabric strip. Mark the lines about a half-inch wider than the tool itself to allow enough wiggle room for easy insertion and removal. For bulky items, add an extra inch of fabric and create a small box pleat at the bottom before stitching.
Why is backstitching so important on the pocket tops?
When you pull tools out of your organizer, the top corners of the pockets experience a significant amount of upward pulling force and friction. Backstitching three or four times at the very edge of the pocket opening reinforces the thread, preventing the stitches from popping or unraveling over time under daily stress.
Conclusion
This sewing organizer tutorial provides you with a comprehensive, step-by-step framework to build a custom, highly functional storage system tailored directly to your unique creative workflow. By carefully selecting durable fabrics like canvas or denim, applying structural interfacing, and designing personalized pocket dimensions, you can easily declutter your workspace and protect your valuable tools.
This project proves that workspace organization can be both incredibly practical and aesthetically beautiful, adding a lovely touch of handmade charm to your creative environment. Now that you have learned how to measure, cut, interface, layer, and bind your own multi-tiered utility holder, you can apply these valuable techniques to a wide variety of advanced crafting projects in the future.