If you’re looking for a satisfying and eco-friendly sewing project, an Easy quilt block made with fabric scraps – pattern might be the perfect choice.
This fun and accessible technique allows you to turn leftover fabric into beautiful, functional quilt blocks.
Whether you’re a beginner or an experienced quilter looking to reduce waste and stretch your creativity, this approach offers endless possibilities.
Creating quilt blocks from scraps not only saves money but also adds a charming, homemade feel to your projects. Each block becomes a visual story, filled with fabric pieces from past creations—little patches of memory sewn together. This makes your quilt more than just a blanket; it becomes a sentimental and personalized work of art.
In this article, we’ll explore how to make an easy quilt block made with fabric scraps – pattern, step-by-step. You’ll learn how to select and prepare your scraps, choose layouts, assemble your blocks, and finish your quilt. Plus, we’ll include expert tips and a helpful FAQ section to guide you. Let’s dive into the colorful, creative world of scrap quilting!
1. Choosing and Organizing Your Fabric Scraps
Before diving into your easy quilt block made with fabric scraps – pattern, take time to organize your materials. Sorting your fabric scraps by size, color, or print will make the process more enjoyable and efficient. You might be surprised at how much usable fabric you already have on hand from past sewing projects.
Start by gathering all your fabric leftovers. Even the smallest pieces can be used in creative ways. Squares, triangles, strips, and irregular shapes can all find a home in a scrappy quilt block. Cotton fabric is ideal because it’s easy to sew and presses well, but you can experiment with blends if you’re comfortable adjusting tension and stitch settings.
If you’re going for a cohesive look, group your scraps into color families—such as warm tones, cool tones, or neutrals. For a more spontaneous and playful look, mix and match boldly. Scrappy quilts are meant to be expressive, so don’t be afraid to break the rules.
Press your scraps with an iron to remove wrinkles, which helps with accurate cutting and piecing. Trim off frayed edges and discard any fabric that’s too thin, worn, or stretchy, as it might affect the durability of your quilt.
Consider cutting your scraps into common patchwork sizes—such as 2.5″, 3″, or 5″ squares—if you want a more uniform look. Using a rotary cutter, self-healing mat, and quilting ruler ensures precise cuts and helps your finished blocks look tidy.
A useful tip is to keep a scrap bin near your sewing area at all times. That way, you can toss leftover fabric from every project into the bin and revisit it later when inspiration strikes for your next easy quilt block made with fabric scraps – pattern.
2. Designing and Assembling Your Quilt Blocks
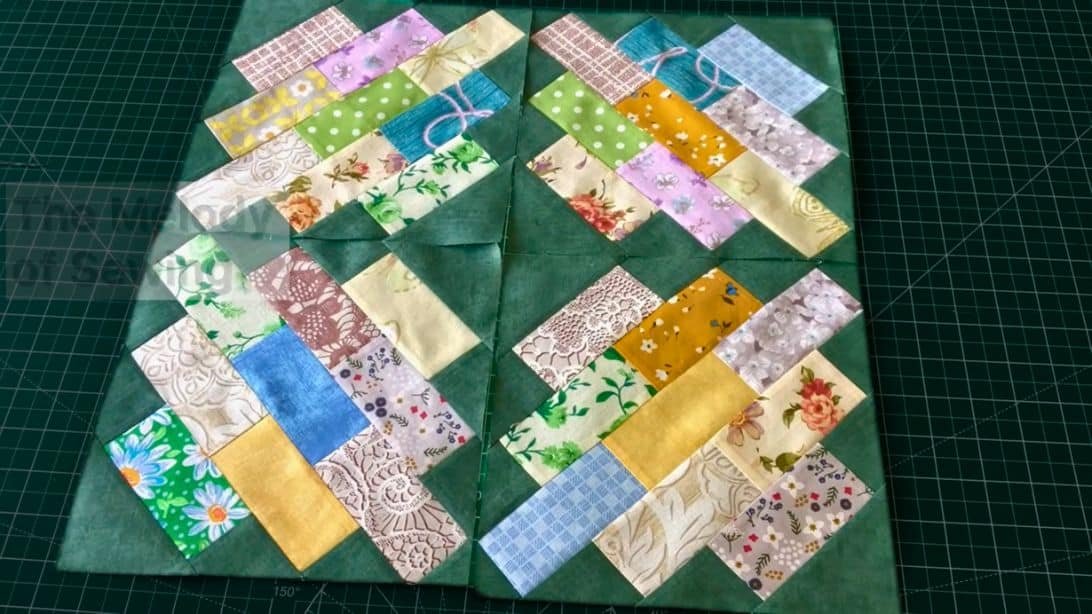
Now that your fabric scraps are organized, it’s time to start designing your blocks. The beauty of the easy quilt block made with fabric scraps – pattern is that it doesn’t require a rigid design. You can follow traditional layouts or create your own unique compositions.
Classic block styles like the nine-patch, log cabin, or string block work beautifully with scraps. For beginners, a simple square or rectangular layout might be easiest. Lay out your pieces before sewing to get a sense of balance and color flow. You can also sketch out your block ideas in a notebook or use digital quilting tools.
Start assembling your blocks by joining smaller pieces into larger units. Use a consistent seam allowance—typically ¼ inch—for accuracy. Sew pieces together in rows, pressing the seams between each step. This will help your blocks lie flat and join smoothly when assembling the quilt top.
If your scraps vary greatly in size, consider creating a wonky or improvisational block. This approach embraces asymmetry and is great for creative expression. Just remember to square up your blocks once finished so they’re all the same size and easy to join.
Chain piecing can save time if you’re working on multiple blocks at once. It involves feeding one piece of fabric after another through your sewing machine without stopping in between. This technique is efficient and keeps your workspace organized.
After sewing, square up your blocks using a quilting ruler. This step ensures your quilt top will come together neatly without gaps or misaligned seams. Don’t skip this step—well-trimmed blocks are the key to a professional-looking finished quilt.
3. Assembling the Quilt Top and Adding Batting
With your quilt blocks completed, it’s time to assemble the quilt top. Arrange your blocks in a layout that pleases you. Play with different configurations—grids, rows, or even diagonal arrangements. Take a photo of your final layout before sewing, so you have a visual guide as you work.
Start sewing the blocks together row by row. Pin or clip blocks at the seams to keep corners aligned. Consistency in seam allowance is essential to make sure everything lines up correctly. Once rows are complete, join them together and press all seams flat.
Next, you’ll need to prepare your batting and backing. For this easy quilt block made with fabric scraps – pattern, lightweight cotton batting works best. Cut the batting and backing about 2–3 inches larger than your quilt top on all sides to allow for shifting during quilting.
Layer the quilt: backing fabric (right side down), batting in the middle, and your quilt top (right side up). Smooth out each layer carefully to eliminate wrinkles. Use quilting safety pins or basting spray to secure the layers together.
Quilting the layers can be done in a variety of ways. If you’re new to quilting, try simple straight-line stitching across the seams. More advanced quilters might enjoy free-motion quilting for added texture and movement. Use a thread color that blends well or adds a subtle contrast.
Once your quilt is fully quilted, trim the edges to square up the layers. This makes it easier to attach the binding and gives your finished quilt a polished look. You’re almost at the finish line!
4. Binding and Caring for Your Scrap Quilt
Binding is the final step in completing your easy quilt block made with fabric scraps – pattern. It not only protects the edges of your quilt but also frames your design beautifully. You can make your own binding from coordinating fabric or use pre-made bias tape for convenience.
Cut your binding strips 2.5 inches wide, join them into one long strip, and press in half lengthwise. Start attaching the binding to the front of the quilt, aligning raw edges. Sew all the way around, mitering the corners for a clean look.
After attaching the front side, fold the binding over the edge to the back and hand-stitch or machine-stitch it in place. Take your time with this step to ensure your stitches are even and secure. A tidy binding gives your quilt a professional finish.
To label your quilt, add a small tag or patch with your name, the date, and maybe a short message. This personal touch is especially meaningful if you’re giving the quilt as a gift or keeping it as a family keepsake.
Caring for your quilt is important to preserve its beauty and longevity. Wash it in cold water on a gentle cycle and use mild detergent. Avoid bleach or harsh chemicals. Tumble dry on low or lay flat to dry to prevent shrinking or damage.
Store your quilt in a dry, ventilated area—never in plastic, as this can trap moisture. If displaying it, rotate it occasionally to avoid fading in one area. With proper care, your scrap quilt will bring comfort and joy for many years.
Finally, consider making a series of placemats, table runners, or even pillow covers using your leftover scraps and blocks. The possibilities with the easy quilt block made with fabric scraps – pattern are truly endless.
Frequently Asked Questions (FAQ)
Q1: What’s the best fabric for a scrap quilt block?
Cotton is the most reliable choice due to its durability, ease of sewing, and wide availability in quilting prints and colors.
Q2: Can I mix fabric types in a scrap quilt block?
Yes, but be cautious. Mixing cotton with stretchy or slippery fabrics may cause warping. Stick to similar weights for best results.
Q3: What size should I make my quilt blocks?
Common sizes are 6″, 9″, or 12″ square, but the size is flexible. Choose what fits your design and scrap sizes best.
Q4: Do I need to pre-wash my fabric scraps?
It’s highly recommended to pre-wash and iron scraps to prevent shrinking or color bleeding after the quilt is complete.
Q5: How do I avoid bulky seams in scrap quilts?
Press seams open or to one side consistently. Trim away excess fabric and avoid layering too many small pieces in one area.
Q6: Is it okay to use scraps of all shapes?
Absolutely! Irregular shapes can add character. Just square up the block once complete to keep everything aligned.
Conclusion
Making an easy quilt block made with fabric scraps – pattern is a fulfilling way to practice your sewing skills, reduce waste, and create something truly unique. From sorting your scraps and assembling blocks to quilting and binding, this process allows you to be both resourceful and artistic. With every piece stitched in place, you’re telling a story—your story.
We hope this guide helped you get started with your own scrap quilt project. If you’ve tried this pattern or have tips to share, we’d love to hear from you. Please leave your sincere opinion or suggestions in the comments below. Your feedback not only helps other readers but also supports the community of passionate quilters around the world. Happy quilting!